
Configure Newforma Konekt Web Viewer Options
This article describes the different options that you can configure in the Newforma Konekt Web Viewer.
To access the options, in the navigation bar, click Options. A dialog with five tabs will appear.
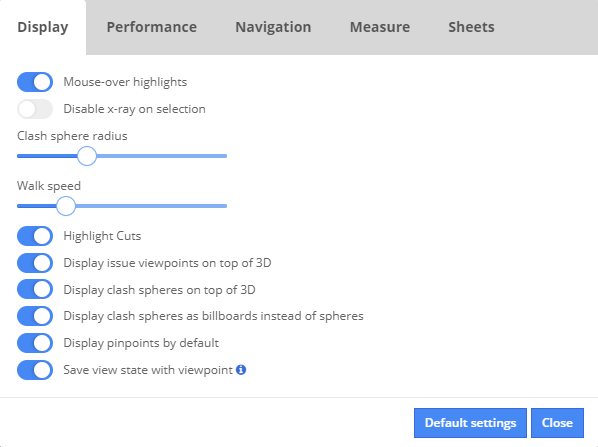
Display tab
The Display tab is the first tab you see when opening the options. It contains the following settings:
| Option | Description |
| Mouse-over highlights | Highlights the elements when hovering over them. |
| Disable x-ray on selection |
If you enable this option and you select an object, you see the rest of the project going to the x-ray view type of mode. Enable the disable if you want to select multiple objects. |
| Clash sphere radius | Allows you to increase or decrease the size of clash spheres. |
| Walk speed | Controls walk speed when using the arrow keys or WASD. |
| Highlight Cuts |
When you have placed a clipping box or a clipping plane on your project, objects being cut show in neon green. |
| Display issue viewpoints on top of 3D | Displays issue viewpoints on top of the model. |
| Display clash spheres on top of 3D | Displays clash spheres on top of the model. |
| Display clash spheres as billboards instead of spheres | Displays clash spheres as billboards instead of spheres. |
| Display pinpoints by default | Pinpoints are refreshed each time items are edited or refreshed. This allows the user to be updated on issues being worked on at the same time, and allows quick navigation from issue or view to another. |
| Save view state with viewpoint |
Determines whether hidden elements and section boxes / clipping planes are kept when creating or updating a viewpoint. |
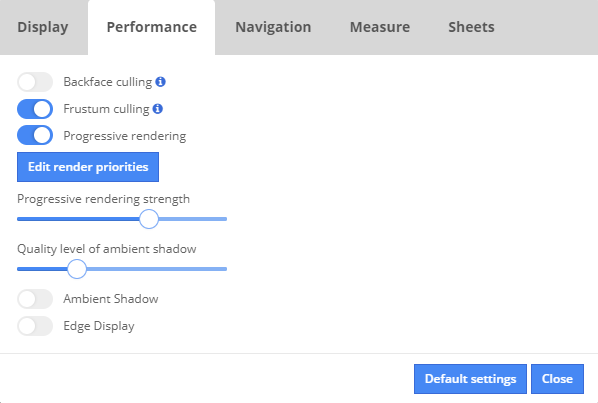
Performance tab
The Performance tab is the most powerful tool at your disposal when it comes to model performance.
| Option | Description |
| Backface culling |
Hides the elements that are faced away from the camera, allowing faster movement in the Web Viewer |
| Frustum culling |
Frustum culling is the process of removing objects that lie completely outside the viewing frustum from the rendering process. Enabling this option greatly improves the Web Viewer performance as all the elements outside of the view scope won’t be loaded in the memory. This option is very handy for large projects that contains many IFC files. On a smaller project, it is not a necessity as the engine will manage to display all the elements without affecting the performance. |
| Progressive rendering |
Progressive rendering is a rendering mode in which the program gradually updates elements of the entire model; refining it from the largest elements to the smaller ones rather than focusing on small elements at the beginning of the rendering process. This option comes very handy for large projects that contains many IFC files. On a smaller project, it is not a necessity as the engine will manage to display all the elements at once. |
| Edit render properties |
Allows you to define which elements should be displayed first. This option is linked to progressive rendering. We recommend prioritizing the elements linked to your work scope. So, if you’re are reviewing the mechanical parts of the project, it is best to prioritize mechanical categories. That way, the display of mechanical elements will be prioritized by the rendering engine. |
| Progressive rendering strength | Decides the level of your progressive rendering. The higher the bar, the more elements are hidden. |
| Quality level of ambient shadow | If you want to have ambient shadows on at all times you can reduce the quality level by sliding the slide bar to the left. If you are using the Web Viewer for presentation purposes slide that bar all the way up to enjoy high-quality shadows. |
| Ambient Shadow | When coordinating multiple models, ambient shadow can sometimes be more of a distraction than a help. Disabling this option lightens areas of the project, but its additional elements are not being rendered, therefore speeding up the loading time. |
| Edge Display |
Puts a thin black line around all the edges of your objects. We recommend playing with that option to see how your model reacts to it turned on versus turned off. |
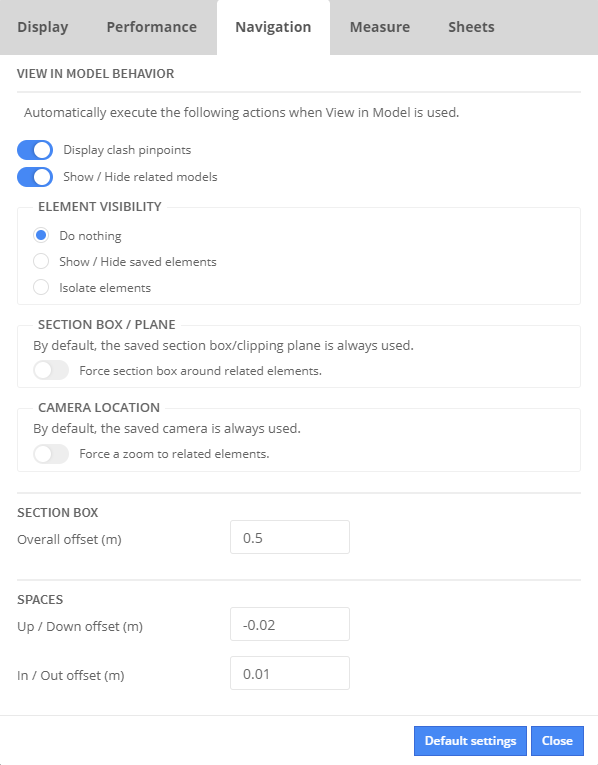
The Navigation tab lets you change the behavior of the View in model feature.
| Option | Description | |
|
Display clash pinpoints |
All the issues created with the Clashes to Issues and Localize issue command will expose their clash pinpoints. | |
|
Show / Hide related models |
Enables or disables the models associated to the disciplines stamp on the issue (see Manage model disciplines). |
|
|
Element visibility |
Do nothing | Ignores hidden/shown elements. |
| Show / Hide saved elements |
Hides elements that have been hidden during issue creation. This option is commonly used when retrieving issues that were created either from the Create Issue or from the Views to Issues command. |
|
| Isolate elements |
Isolates related elements of an issue. Commonly used when retrieving issues that were created from the Clashes to Issues command with the Clash Detective. |
|
| Section box / plane | Force section box around related elements |
Places a section a box around related elements. The section box will always automatically be turned on when retrieving issues with related elements. |
| Camera location | Force a zoom to related elements | Forces the camera position to fit the extents of the elements previously saved in the issue and found in the current model thus ensuring that they are displayed on the screen. |
| Section box | Overall offset |
Controls the offset of the section box around selected elements. |
|
Spaces |
Up / Down offset | Controls the offset of the section box vertically when selecting spaces from an IFC model. |
| In / Out offset | Controls the offset of the section box horizontally when selecting spaces from an IFC model. | |
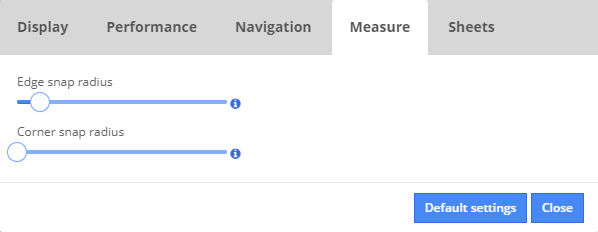
Measure tab
The Measure tab allows you to set the edge snap radius and the corner snap radius. It is linked to the Measure tool.
| Option | Description |
| Edge snap radius |
Snaps to closest edge. Hold Alt to ignore snap. When placing measuring points on an object such as a wall, the node will want to snap to one of the face layers of the wall (int./ext. finish layer, structural framing layer, etc.) With the slider set to the max, you’ll notice that the node stays connected to the wall object and ignores the mouse pointer. With the slider set to the minimum, the measure point sticks to the tip of the mouse pointer. |
| Corner snap radius |
Snaps to closest summit. Hold Alt to ignore snap. The slider for the corner snap radius controls how strongly the measure point wants to snap directly to the corner of an object. When working in close proximity of a large number of elements, a strong corner snap radius is recommended. |
Sheets tab
The Sheets tab contains options related to sheets.
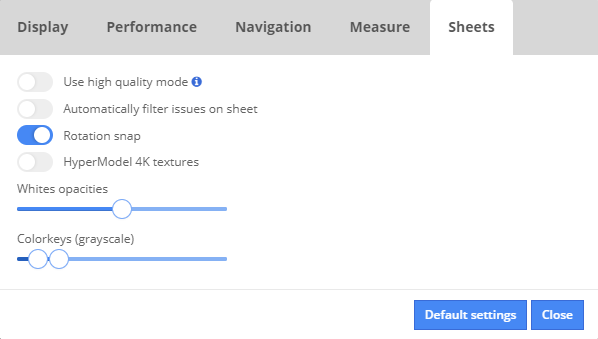
| Option | Description |
| ★ Use high quality mode |
Enable this option when you want to sharpen details of the sheet. By default, this option is disabled to improve performance and loading time in the Web Viewer. When you add sheets or revisions, they will be converted to a lower quality version and will be available once the conversion is completed. Refresh your page to see if the conversion is completed. |
| Automatically filter issues on sheet |
Filters issues so that only issues on a particular 2D sheet are displayed. The issues must have been created on that sheet. |
| Rotation snap | When manually importing sheets that need to be rotated (elevations/sections/details/etc.). This option facilitates the rotation of the sheet to align it with your model. |
| HyperModel 4K textures | Use this option when using 4k screens. |
| Whites opacities | Controls the whites opacities to increase or decrease the transparency of your sheets. Sliding to the left make your sheets more transparent; sliding to the right make them less transparent. |
| Colorkeys (grayscale) | Controls grayscale if there are colors on the sheet. |