
Create and Manage Custom Project Roles
2 minutes
2 months ago
Custom project roles let you mix and match access permissions by activity center.
Create a Custom Role
To create a custom role in the Roles and permissions page:
- Select the Custom Project Roles tab.
- Click Create role.
- Enter a name for the role in the Role name field.
- For each activity center, select the access tier you want to assign to the role: No access, Reviewer, Reader, Editor, or Admin.
- Click Save.
The role will appear in the Custom Project Roles tab and can be assigned to users from the User management page.
Look for the tag in the modal’s top-left corner; it indicates whether the custom role you’re creating requires a license.
Edit a Custom Role
To change an existing role’s access tiers across activity centers:
- Select the Custom Project Roles tab.
- Click the role you want to edit.
- Update the role name or access tiers as needed.
- Click Save.
Changes apply immediately to all users assigned that role.
Delete a Custom Role
To remove a custom role:
- Select the Custom Project Roles tab.
- Click the role you want to delete.
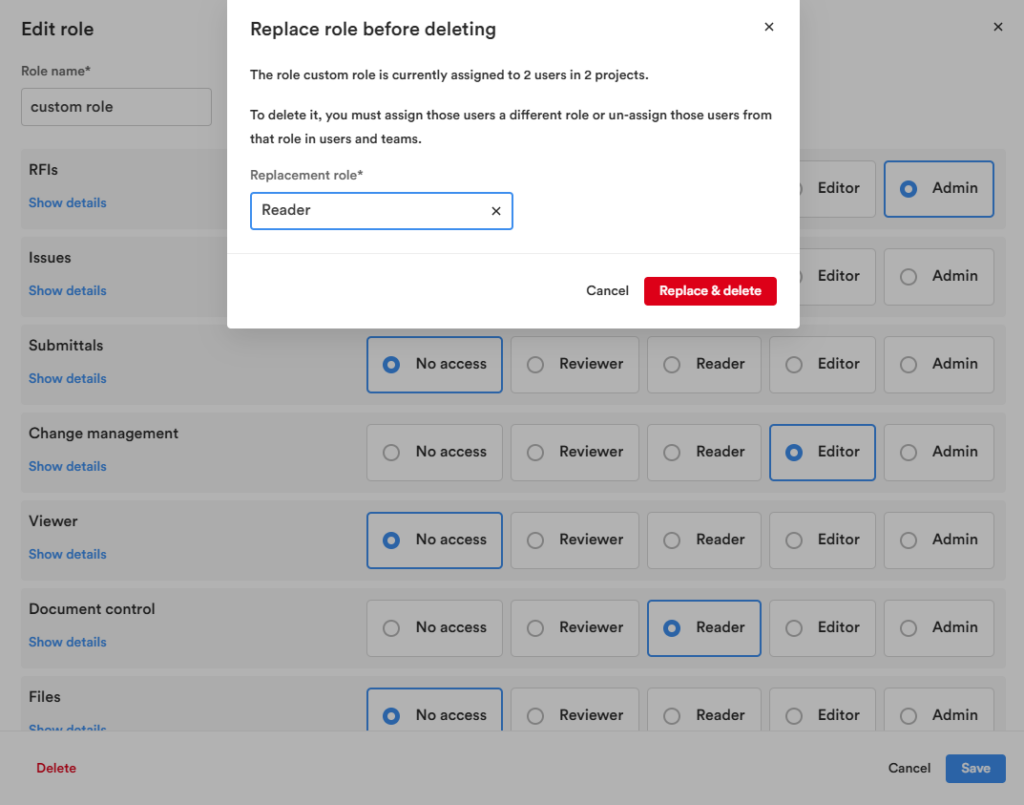
- Click Delete.
If this custom role has users assigned to it, you’ll be prompted to reassign those users to another role first, as a custom role cannot be removed while it still has assigned users.