
Create a Project
Introduction
Hub owners and admins can create projects to manage their team’s workload.
To create a project, follow the steps below:
- Log in to Newforma Konekt.
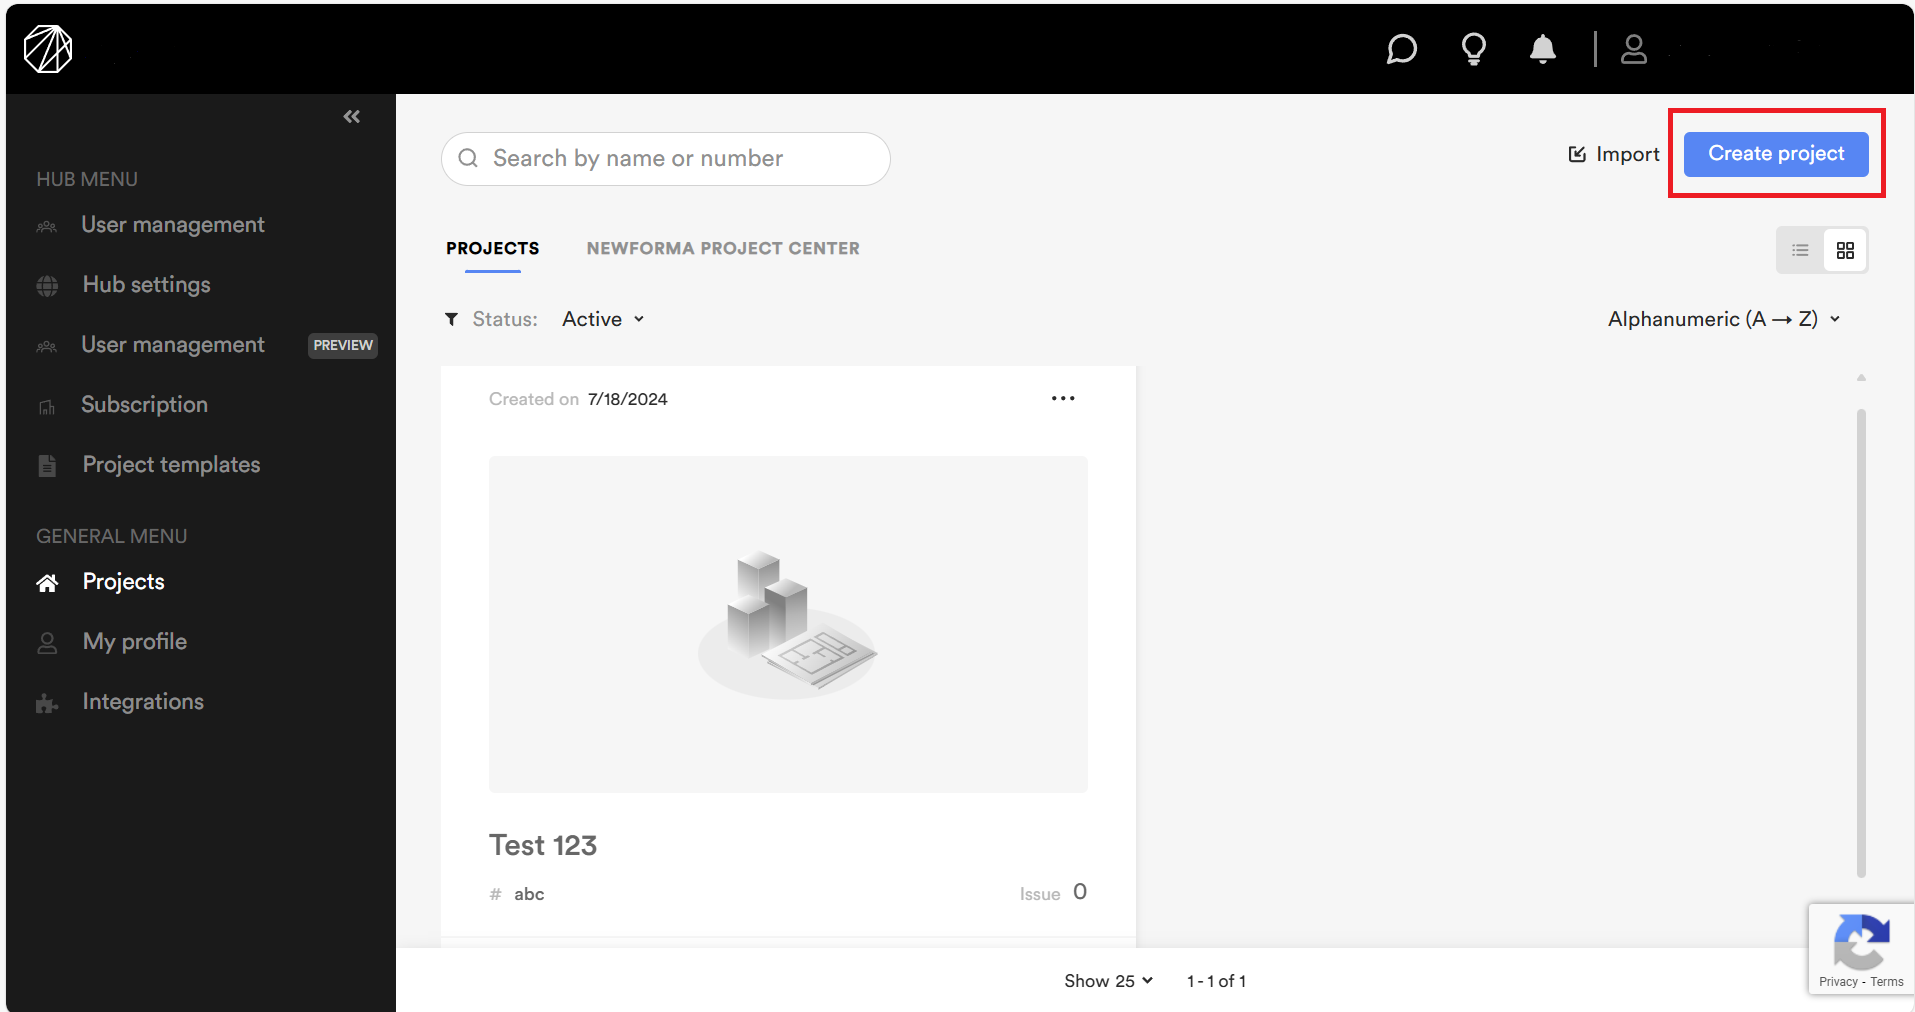
- Click on the Projects item in the General menu on the left side of the window to open the Projects page.
- Click the blue Create project button on the top right-hand side. If this is your first project, you can also click the Create project link in the middle of the page. The Create project window opens.
- Enter a name for your project.
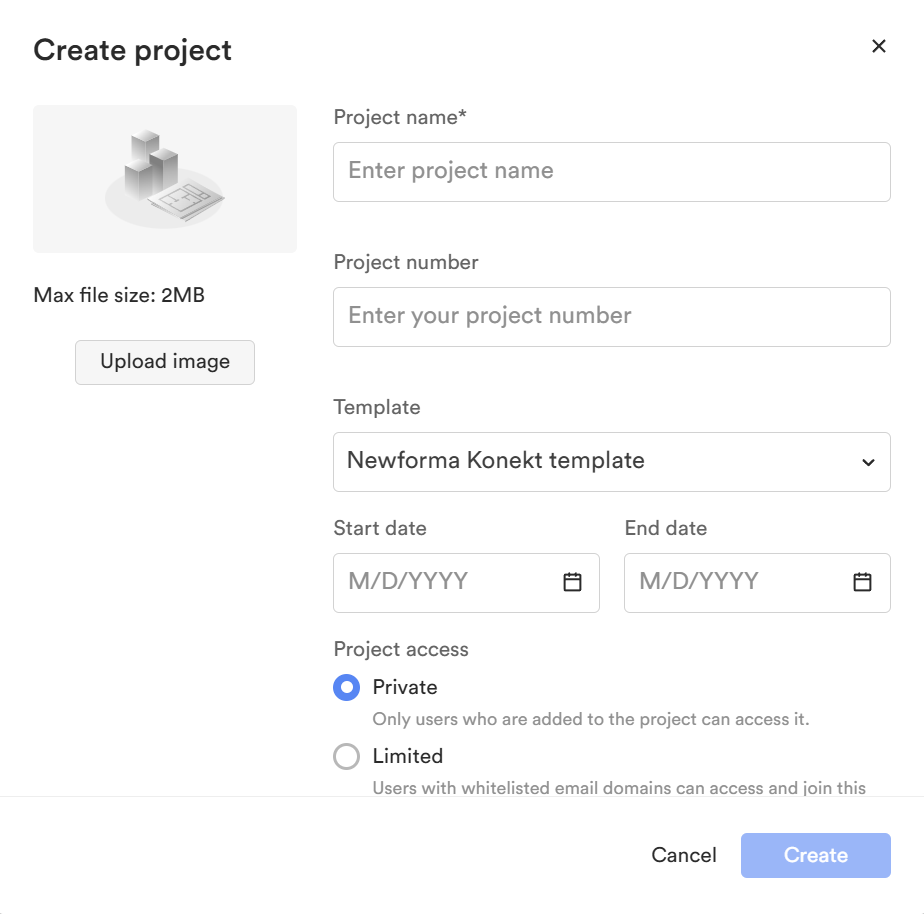
- Optionally, you can specify a project number and upload an image.
- It is possible to select a template from a previous project from the Template dropdown menu. For more information, see Project Templates.
- Specify a start and end date (optional) for information purposes.
- Specify the project access between Private and Limited.
- If you create a project in a hub created before August 19th 2024, you can select between two storage options:
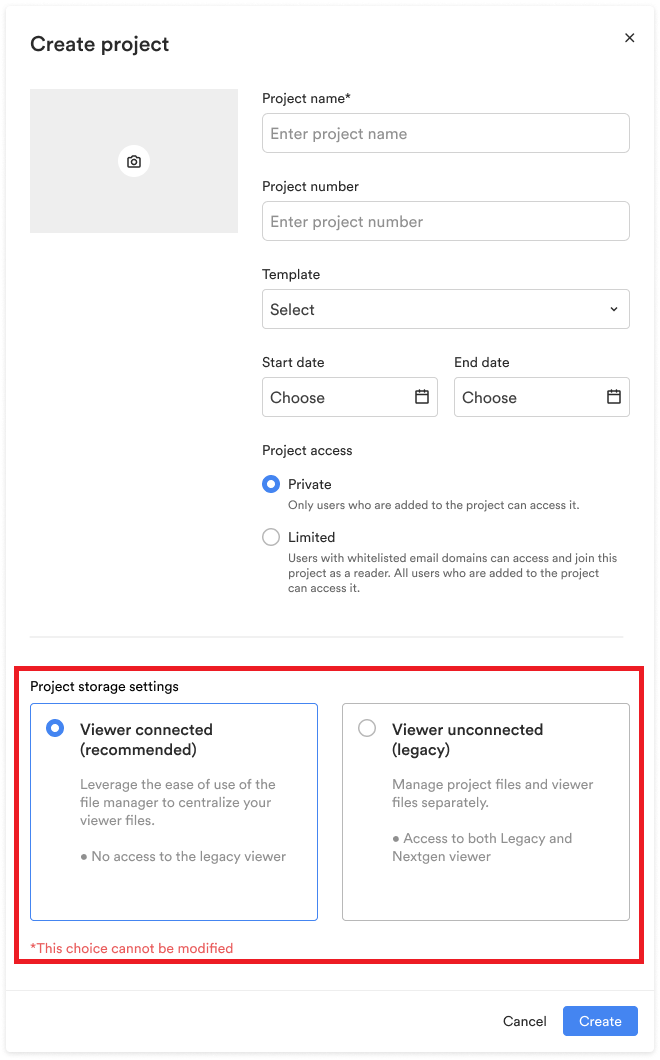
- Viewer connected (recommended): Select the option to connect the specific project to the Viewer. Files are stored in the File manager and users have access to the Next Gen Viewer only.
- Viewer unconnected (legacy): Select the option to continue using the legacy Viewer, only, and the files won’t be stored in the File manager. Users have access to the legacy and Next Gen Viewer.
Important note: Users cannot modify this choice after the project has been created. Hubs created after August 19, 2024 have all their projects connected to the File manager and only to the Next Gen Viewer.
- Click Create. The Project settings page opens.
- Define project settings in the Project settings page.
If for any reason you want to delete your project, refer to Delete a Project.
Import projects
It is now possible for hub admins to bulk import projects with CSV files to Newforma Konekt hubs from the Projects page. This allows hub admins to add projects to Hubs without requiring integrations from other project management software to Newforma Konekt.
Note:
- A maximum import of 100 projects at a time is supported through a single CSV file. You can upload additional projects on another CSV file once the previous import is complete.
- Only hub admins can import projects using the CSV file at this time.
Click on the appropriate link below, according to the date of the hub creation, to download an optional CSV file template for the project import:
- For projects imported in Hubs created before August 19, 2024:
- For projects imported in Hubs created on August 19, 2024 or after:
Excel files are not supported for the user import. See this article for more information on converting Excel files to CSV files.
The following fields can be imported from your CSV file:
- Project name (mandatory): 100 characters max
- Project number: 75 characters max
- Project template:
- This field must match an existing project template in your hub.
- You can also leave this field empty, in which case, the project template will be set to the Newforma Konekt template by default.
- Refer to the Project Templates article for more information.
- Project access:
- If mapped, this field must be filled with one of the following values: Private or Limited.
- You can also leave this field empty, in which case, the project access will be set to private by default. Refer to the Project access article for more information.
- Start date: For date fields (Start date or End date), the following formats are supported:
- ISO Format (ex: 2024-10-22 or 2024/10/22)
- US Format (ex: 10-22-24 or 10/22/2024)
- Day-Month-Year (ex: 22-10-24 or 22/10/2024)
- End date: See date formats above.
- Project storage settings:
- This field will only be available if your hub was created prior to August 19th 2024. It will allow you to decide which Viewer experience to link to your project: the Viewer connected to the File manager or unconnected from the File manager.
- If mapped, this field must be filled with one of the following values: Viewer connected or Viewer unconnected.
- You can also leave this field empty, in which case, the project will have the Viewer connected to the File manager.
Upload a CSV file in the Projects page
Follow the steps below to add projects by uploading a CSV file:
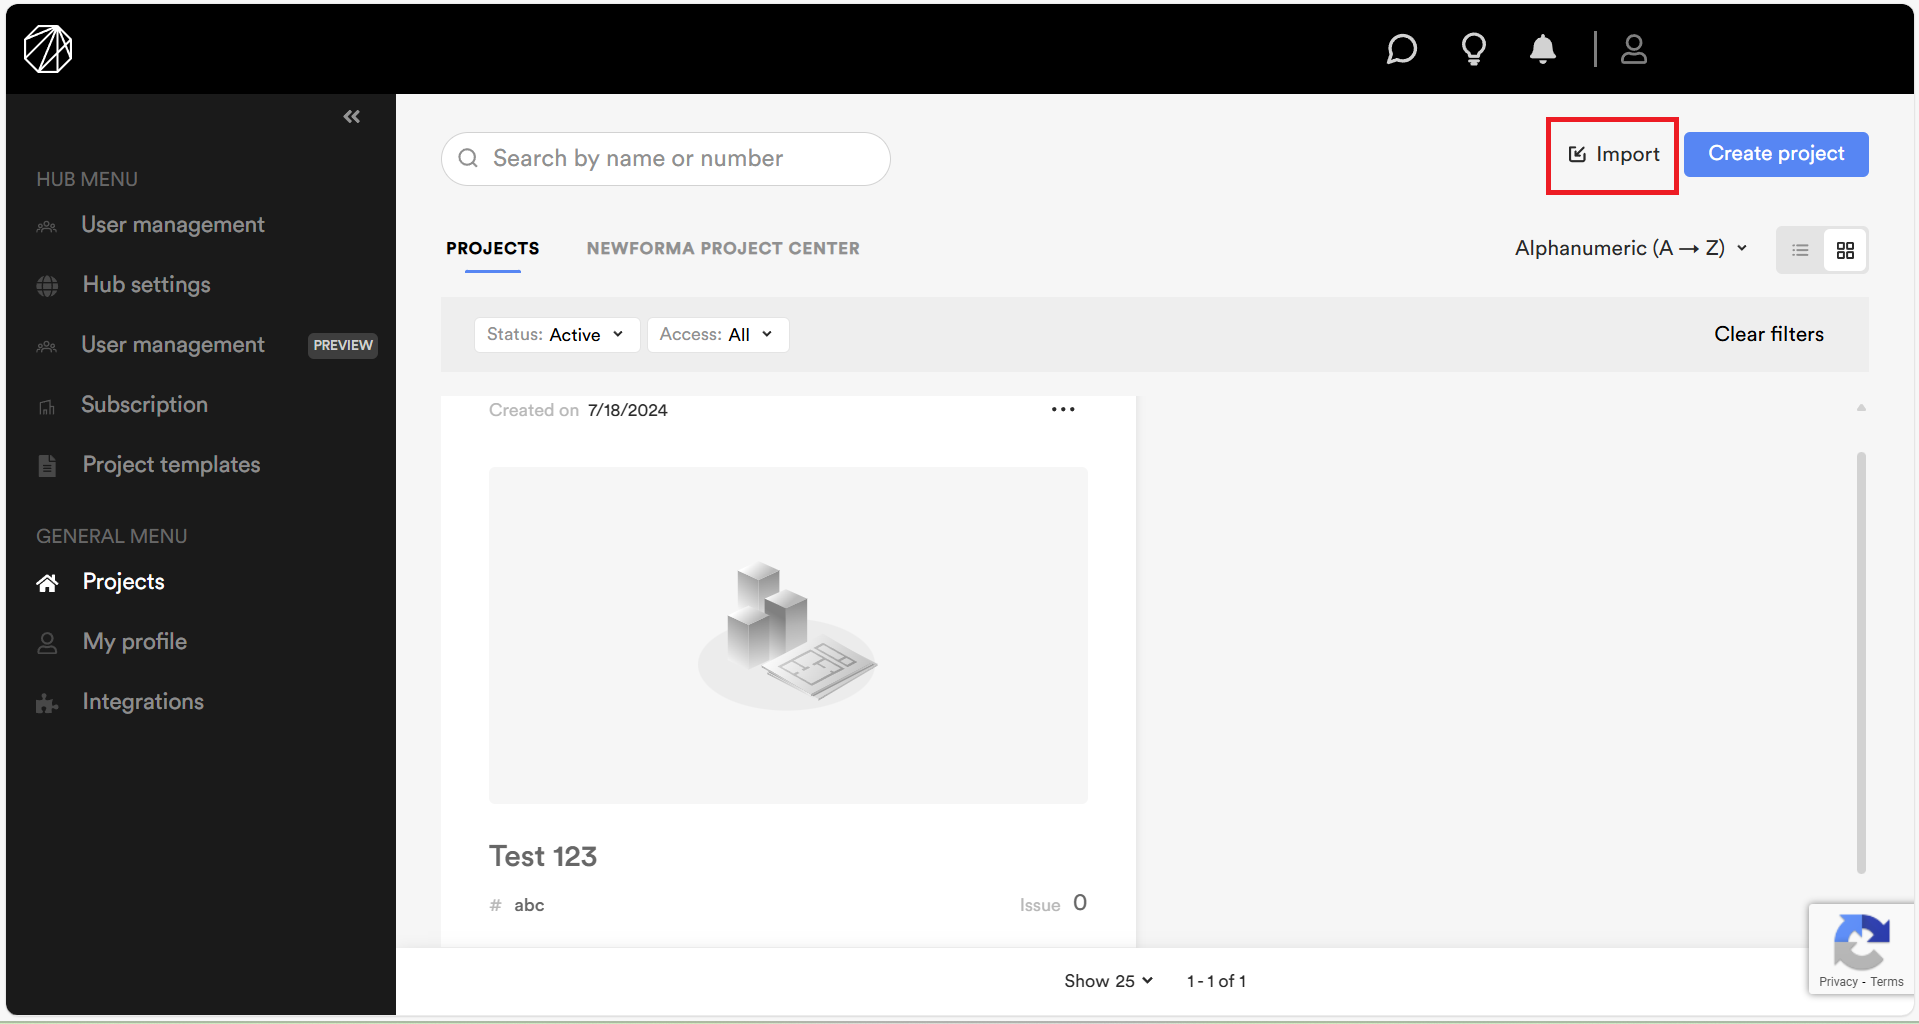
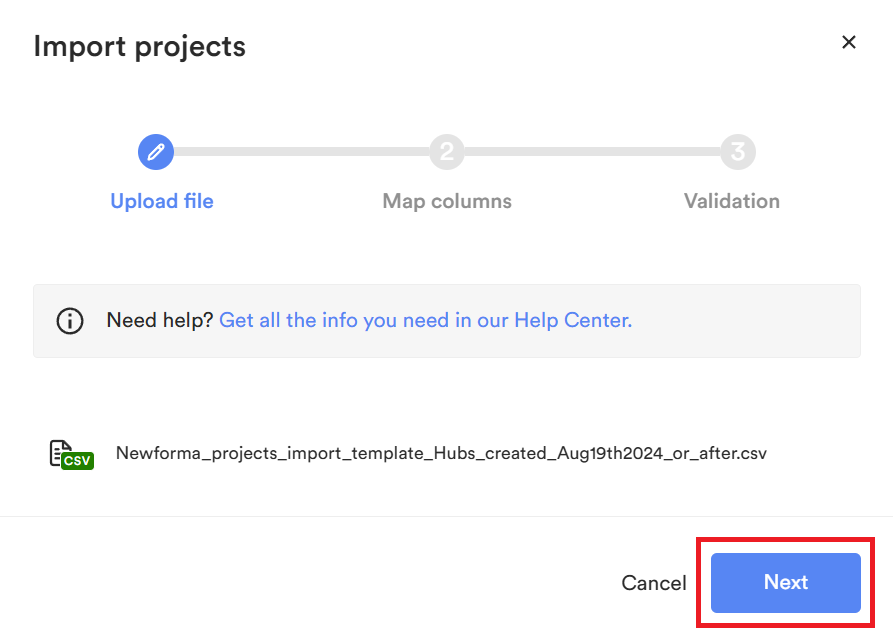
- Click on the Import button at the top right of the Projects page. The Import projects: Upload file page opens.
- Click on Browse and select the desired CSV file with the projects you want to add.

- Click Next at the bottom of the Import projects: Upload file window. The Import projects: Map columns window opens.
Map columns
Follow the steps below to map the columns in the spreadsheet to Newforma Konekt:
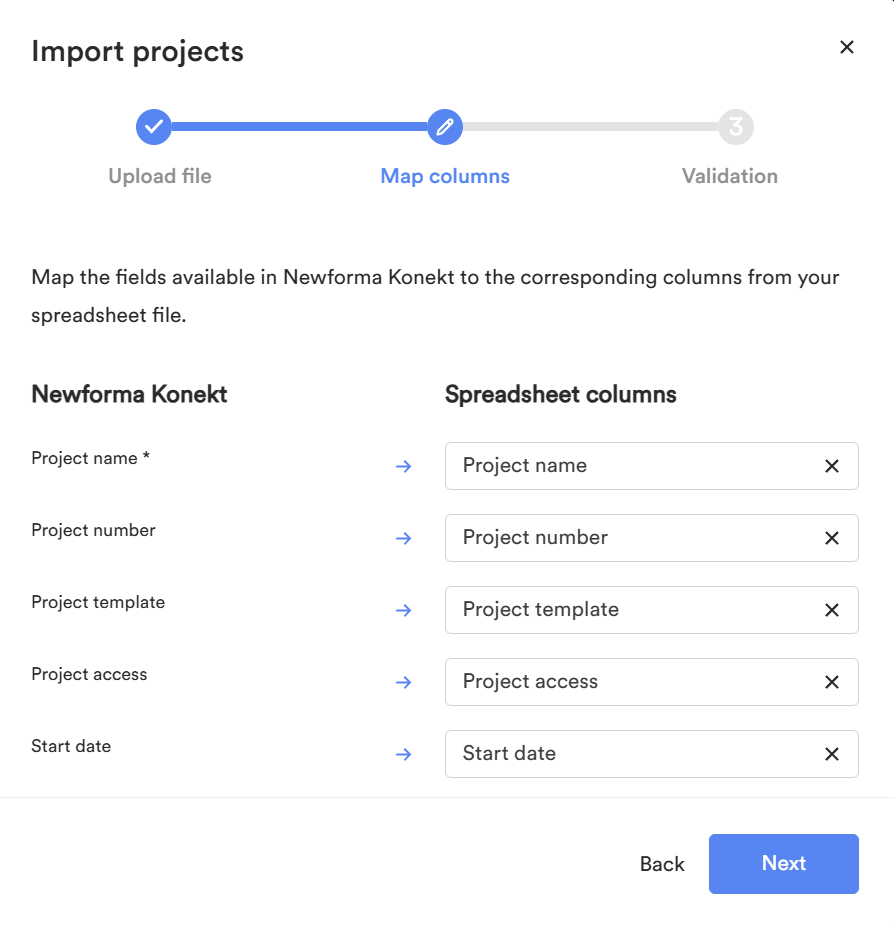
- Map a spreadsheet column to an existing Newforma Konekt field by clicking on the Spreadsheet columns dropdown menu (containing the titles from your CSV columns) and selecting the CSV column you want to map to the field on the left. Repeat this step for all Spreadsheet columns.
- Make sure to fill out / map out the mandatory fields; the Project name field is mandatory.
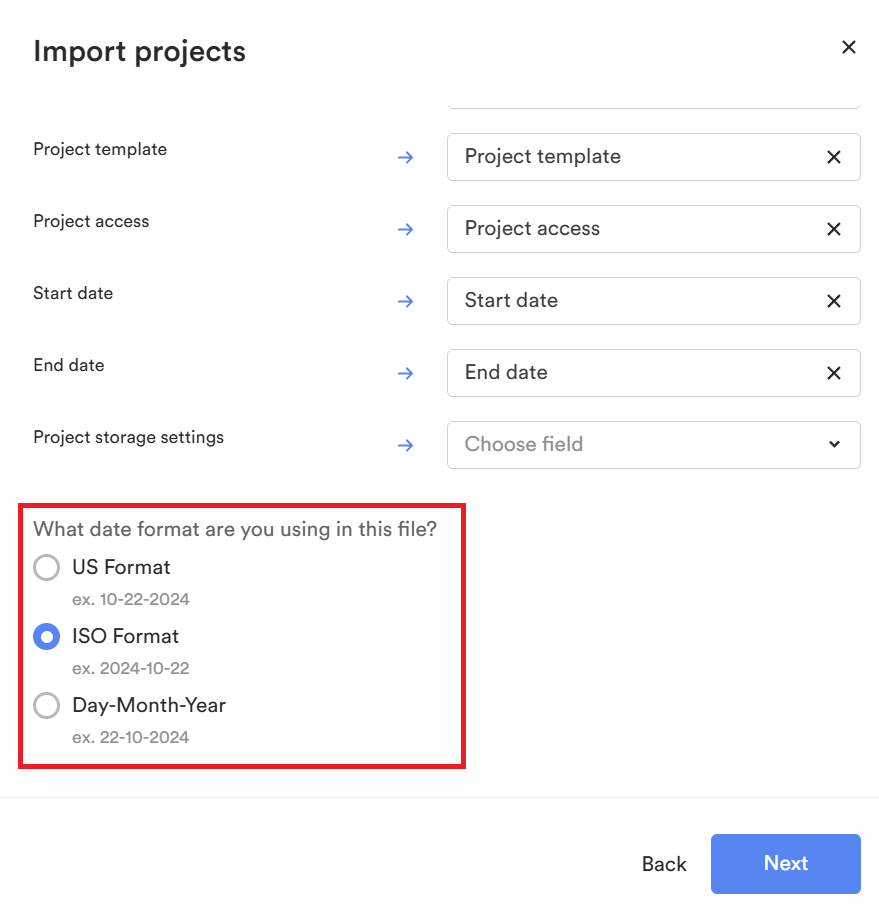
- Select the Project access. If the Project access field is left blank, the Private project access will be assigned by default.
- Select the Project storage. If no project storage settings are mapped, the Viewer connected to the File manager will be associated by default to the project.
- Select the date format. The Date fields (Start date and End date) must follow the date format used in the CSV file.
- If you do not wish to map other fields to the Newforma Konekt fields, you can leave the space blank or select the Ignore option in the dropdown.
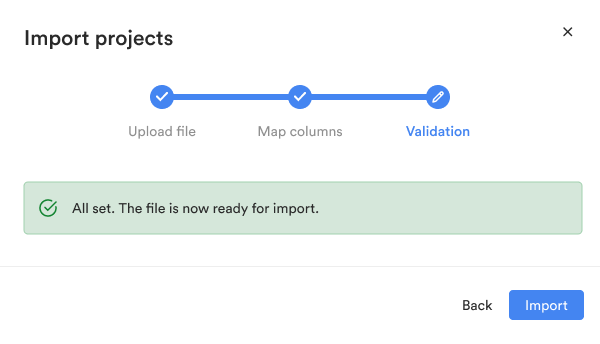
- Once all of your desired fields are mapped, click Next at the bottom of the Import projects: Map columns window. The Import projects: Validation window opens.
- Review your selection and once you are content that the CSV file selected and mapped is correct, click on the Import button at the bottom right of the Import user: Validation window.
- Review your selection and once you are content that the CSV file selected and mapped is correct, click on the Import button at the bottom right of the Import user: Validation window.
- Once that is done, the projects in your CSV file will be imported to your hub and their related information will also be populated in your hub.
- If the Import projects: Validation window shows a list of errors in the CSV file you uploaded, make the corrections in the CSV file, save, and click Change file in the Import projects: Validation window to re-upload the corrected CSV file. Your previous column mapping will be saved so that you do not need to repeat this step again if you do not want to.
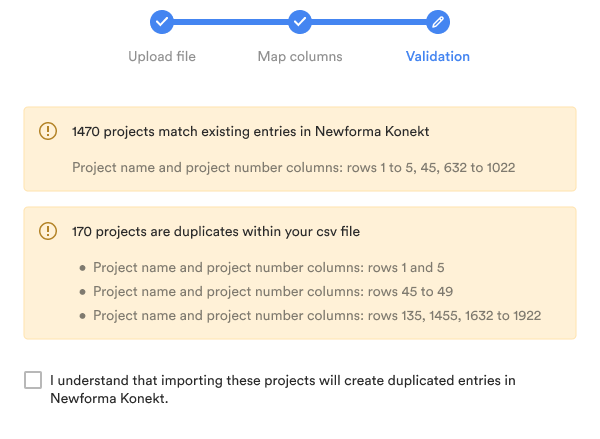
Duplicate projects
There are 2 use cases related to duplicate projects that could result in a warning message before the finalization of your import:
- One or multiple projects from your CSV file match an existing project in your Newforma Konekt hub (same combination of Project name and Project number).
- There are duplicate projects within your CSV file (same combination of Project name and Project number).
In these use cases, a message will be displayed in the Import projects modal to warn you of these duplicates. You will then be able to choose if you want to complete the import process and import these duplicates or change your file to remove these duplicates.
Additional Error Troubleshooting
Here are some of the errors that may be found in your CSV file:
- Some rows exceed the allowed character limit.
- Some rows are missing the Project name.
- Some rows do not contain a valid project access; Private or Limited or field left empty.
- Some rows do not contain valid project storage settings; Viewer connected or Viewer unconnected or field left empty (for projects in hubs created prior to August 19, 2024).
- Some rows contain dates that are not in a valid format.
- Some rows contain end dates that are before the start date in the corresponding rows.
- Your subscription’s project limit has been exceeded.
- Some rows do not contain a valid project template (an existing project template in Newforma Konekt or field left empty).