
Add and Manage an Autodesk Docs Data Source
If a user does not access the Autodesk Docs Data Connector at least once every 14 days it may require a reconnection.
You can use the Newforma Konekt file manager to access and download files that are stored in Autodesk Docs (Autodesk Construction Cloud and Autodesk BIM 360).
Add a custom integration (Autodesk Docs admins only)
Before adding your data source, if you wish to select individual Autodesk Docs projects, each project must be linked to our service by your Autodesk Docs administrator. Your Autodesk Docs administrator needs to create a custom integration between Konekt and your Autodesk docs.
The integration is created within Account Admin > Custom integrations (see image below). It will connect all projects associated with the Hub to Newforma Konekt and you can read more about the integration on Autodesk’s Help Centre.
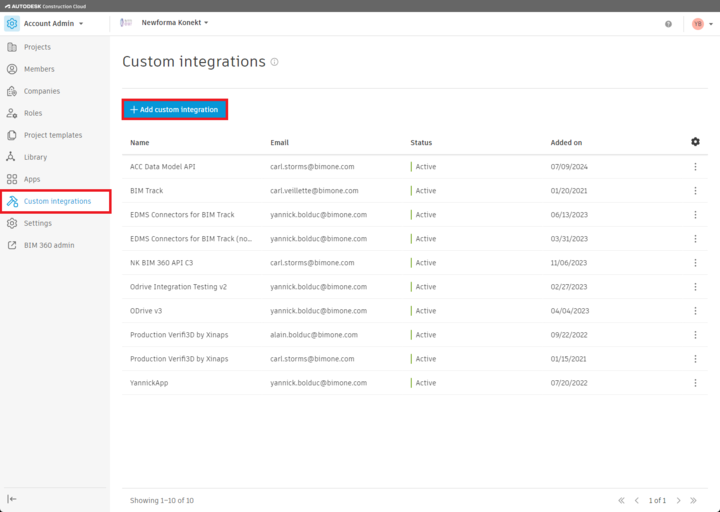
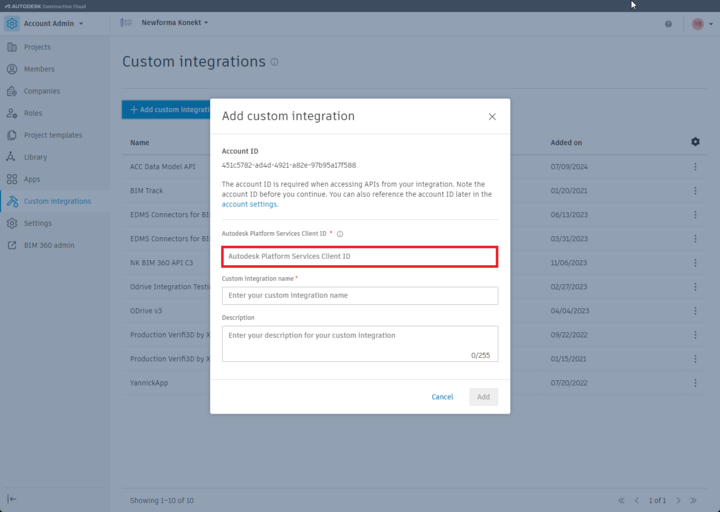
The Admin should click Add custom integration and enter the following information:
- the Konekt Client ID: tnlkjHmkPsAn9g166sqAjXgjoA2RlpSd
- custom integration name
- a description for the connection
This will complete the Autodesk Docs-Konekt connection. The connection only needs to be made once.
Users will be able to select which specific project(s) they want to connect when adding Autodesk Docs as a data source within Konekt. Users can only see projects they have access permissions for within Autodesk Docs. They can only connect one project at a time.
Add an Autodesk Docs data source
- In Newforma Konekt, open the desired project
- In the main menu, under Project menu, select Files to open the file manager.
- In the file manager, click+ Add data source at the bottom of the screen.
- In the Select your data source dialog box, select Autodesk Docs and click Select.
- In the new tab that opens, click Authorize. Once you have successfully logged in, you will be redirected to Newforma Konekt.
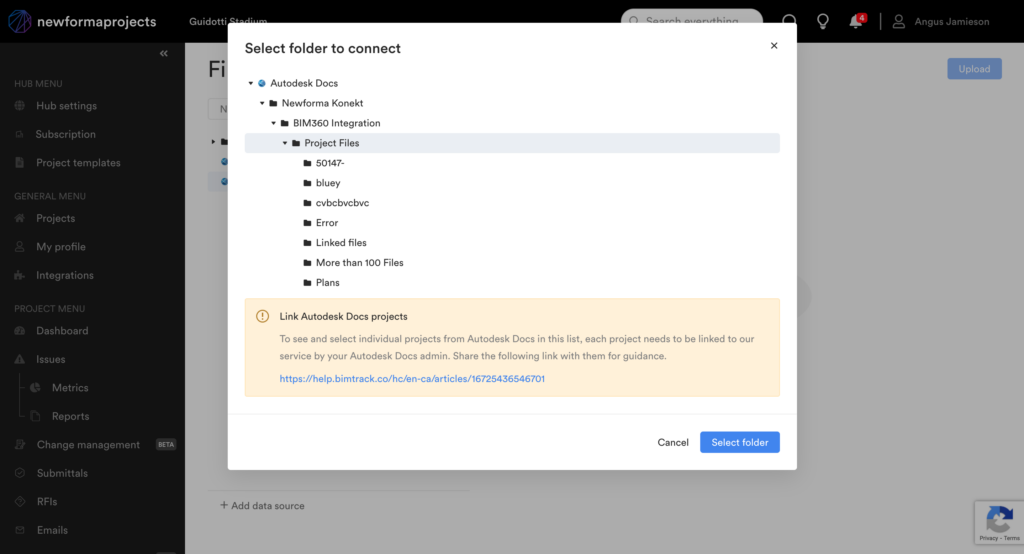
- Select the project or folder to connect and click on Select folder. Your new data source is now available in your Newforma Konekt project.
Add a new folder
- In the folder tree on the left, hover over the data source.
- Click the three dots icon > Add new folder.
- Select folder you want to connect and click Select.
Remove a folder
- In the folder tree on the left, hover over the connected folder you want to remove.
- Click the three dots icon > Remove folder.
- When prompted to confirm your choice, click Remove.
Rename the data source
- In the folder tree on the left, hover over the data source.
- Click the three dots icon > Rename.
- Change the name of the data source and click Save.
Remove the data source
- In the folder tree on the left, hover over the data source.
- Click the three dots icon > Remove data source.
- When prompted to confirm your choice, click Remove.
Rename a file or folder
- Select the data source and navigate to the file or folder you want to rename.
- Hover over the desired element and click the three dots icon > Rename.
- Change the name and click Save.
View file or folder details and history
- Select the data source and navigate to the file or folder you want to open.
- Hover over the desired element and click the three dots icon > Open details.
- In the right-side panel, under the Details tab, you can see the element’s details. To view its history, click the History tab.
Download a file
- Select the data source and navigate to the file you want to download.
- Hover over the desired file and click the three dots icon > Download.
Delete a file
- Select the data source and navigate to the file you want to delete.
- Hover over the desired file and click the three dots icon > Delete.
- When prompted to confirm your choice, click Delete file.
- Select the data source and navigate to the file you want to share.
- Hover over the desired file and click the three dots icon > Share. You can also select multiple files to share and click the share icon at the top of the list.The maximum number of files that can be shared is 100 at a time or 10GB in total size.
- Select or enter the recipients’ email address(es), enter remarks if necessary, and click Share. Only the most recent version of the file will be shared.
- During the share, you can click the x in the activity window at the bottom of the screen to cancel share. A confirmation of the cancel will be prompted.
A copy of the shared files is created at the time of share. Once the download is complete, the recipient(s) will receive an email containing a link to download the record copy of the shared files. The link will be available for 2 weeks.
You can see successful share actions and user downloads in the history of the files. Any shares or updates made directly in Autodesk Docs will not be reflected in the history.