Manually Insert Sheets from PDF Files
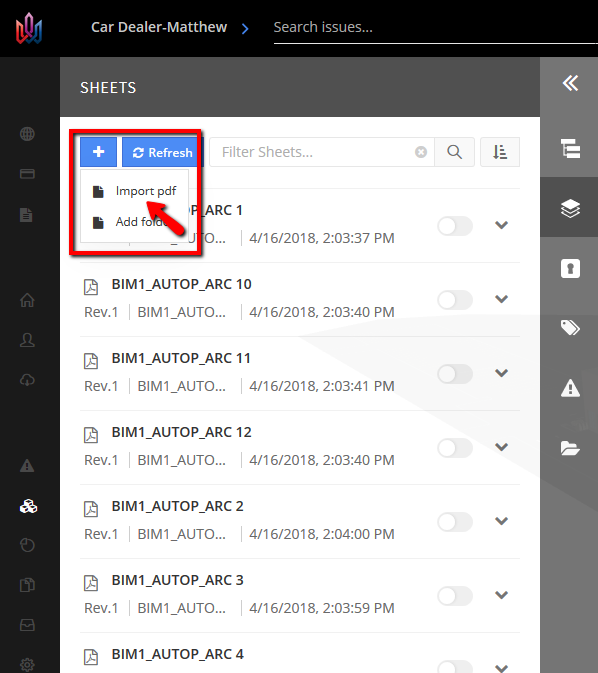
Once PDF documents (2D Plans) are created from your project they can be imported to the online Viewer for what is called hyper modeling. In the Sheets command click the blue plus sign and select Import PDF.
Locate or drag and drop your PDF files into the IMPORT PDF dialog box. They will upload and then analyze.
Switch the toggle to the On position. Your PDF will appear in the online viewer. More often than not the height, scale, and location of your PDF will be perfectly aligned. A section plane is automatically used to section off anything above the cut plane of your PDF.
In my example the file I turned on is not to scale, and not in the right location. Follow these steps to line your model and PDF up accurately.
- Put the model into an orthographic view state from the Camera drop down.
- Use the view cube to rotate the model (Top).
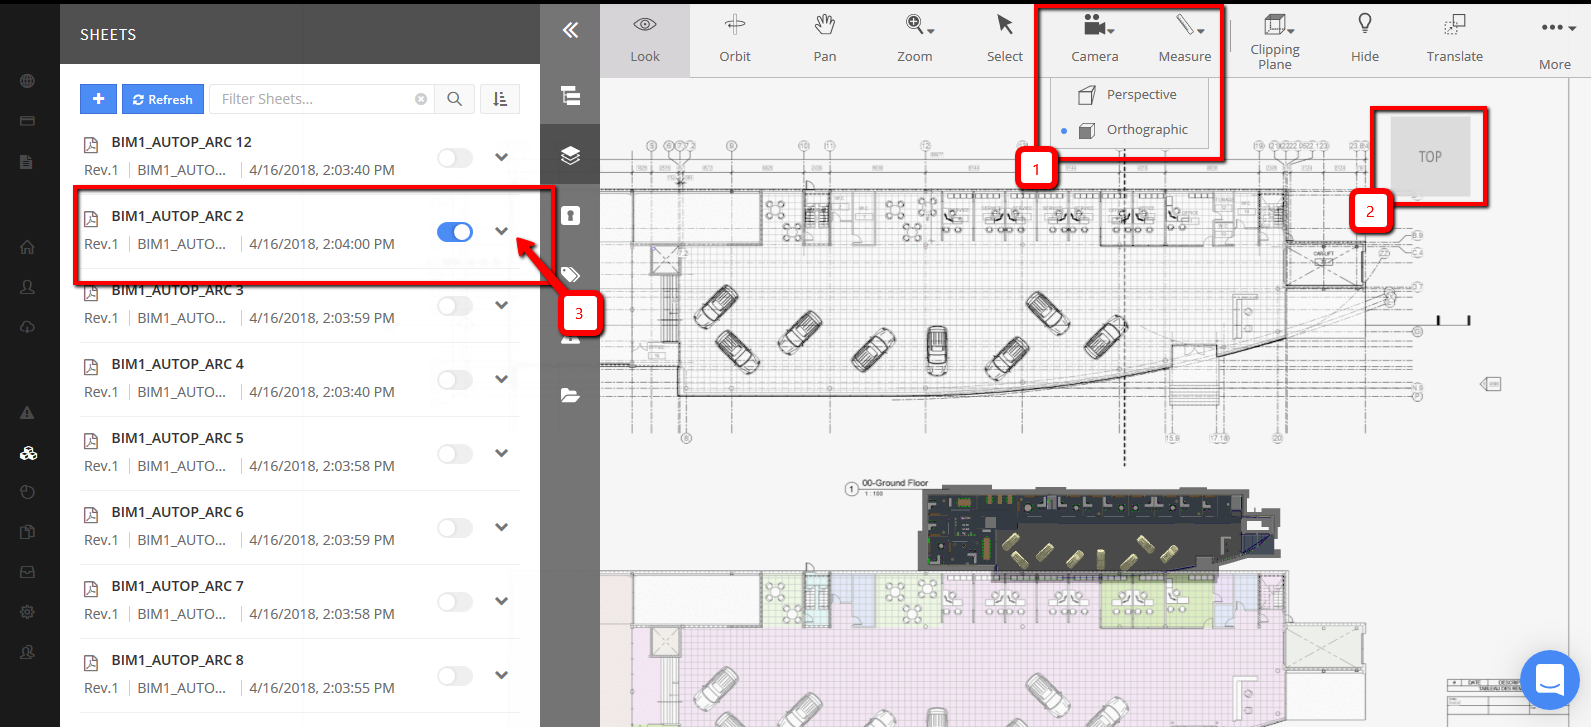
- Beside the PDF file you have to click the down arrow.
- Click the Edit in viewers command
- Along the top of the viewer you will see three new commands appear. Select Fit sheets.
- Two dots will appear. One in the top right and bottom left corners.
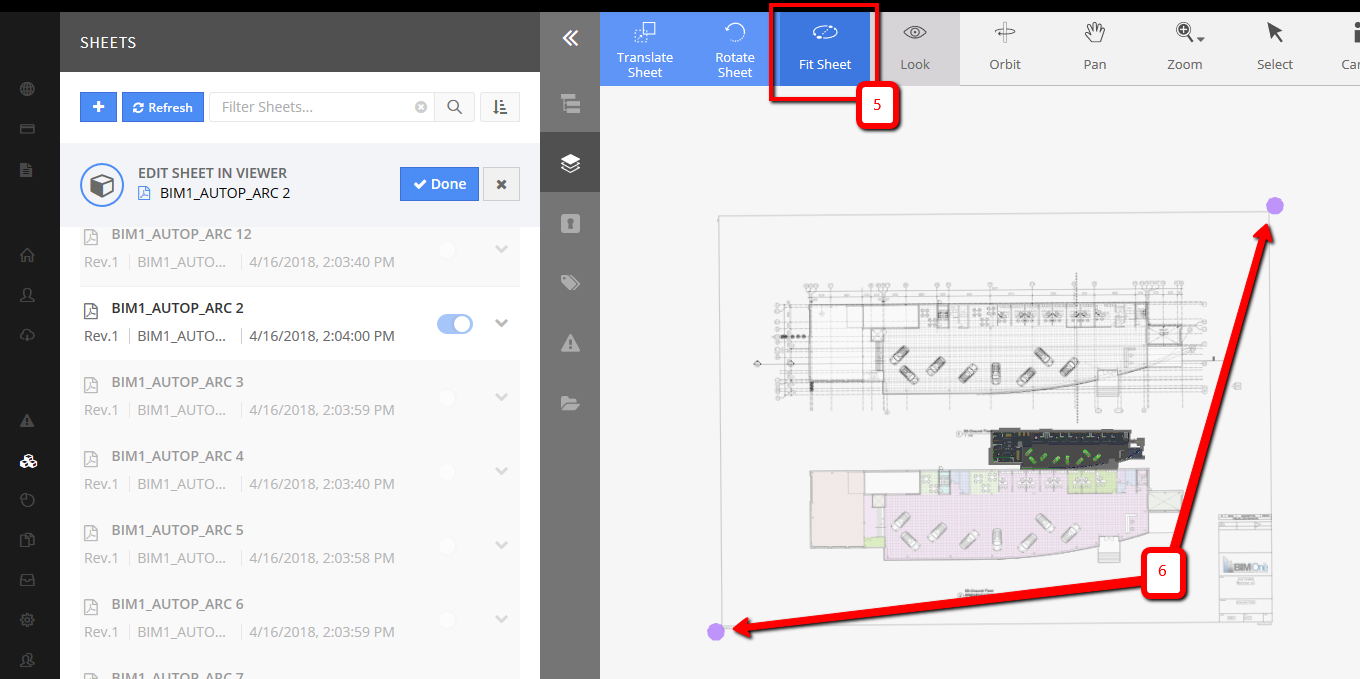
- Click and hold the dot in the bottom left corner. Drag it to a very obvious point in the PDF file (Good places are the edges of doors, corners of rooms, edges of stairs, etc.). Zoom in with the scroll wheel of the mouse to get the point as accurate as possible.
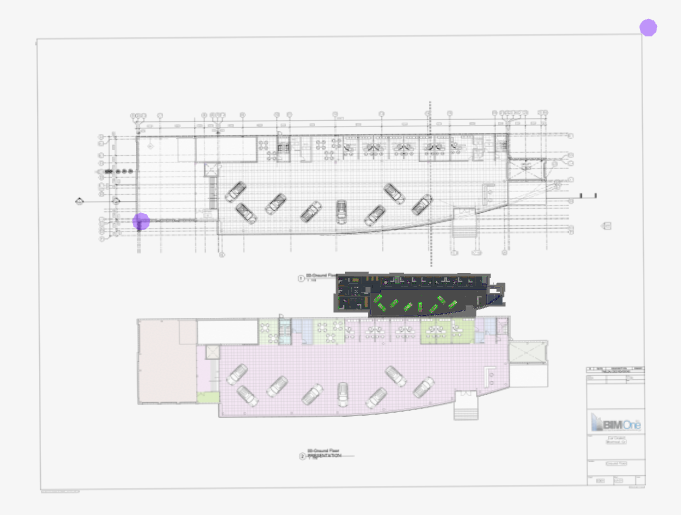
- Hold down the control (Ctrl) key, while clicking and holding the mouse button on the same dot, drag it to the same location in the model.
- Your result should be similar to the image titled ‘Step 9’.
- Repeat the process with the other dot.
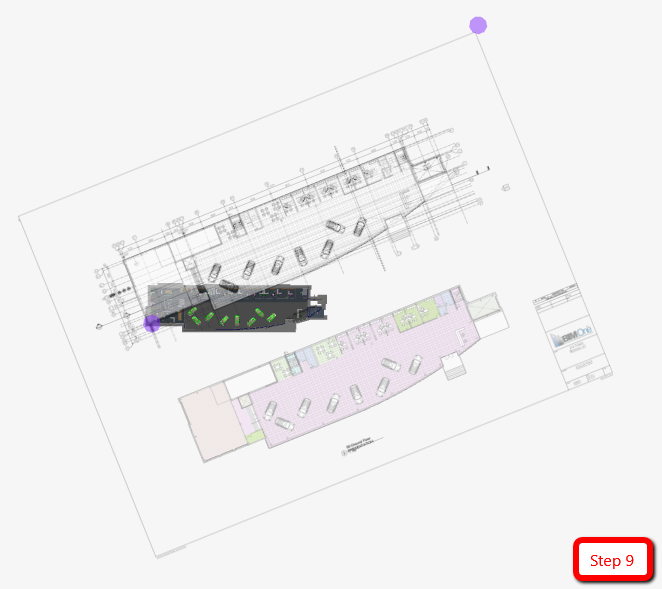
- With both dots lined up with elements in the Viewer we can fine-tune the alignment and scale by repeating the process with other elements in the model.
- Click the Done button when you are satisfied with the scale and alignment.
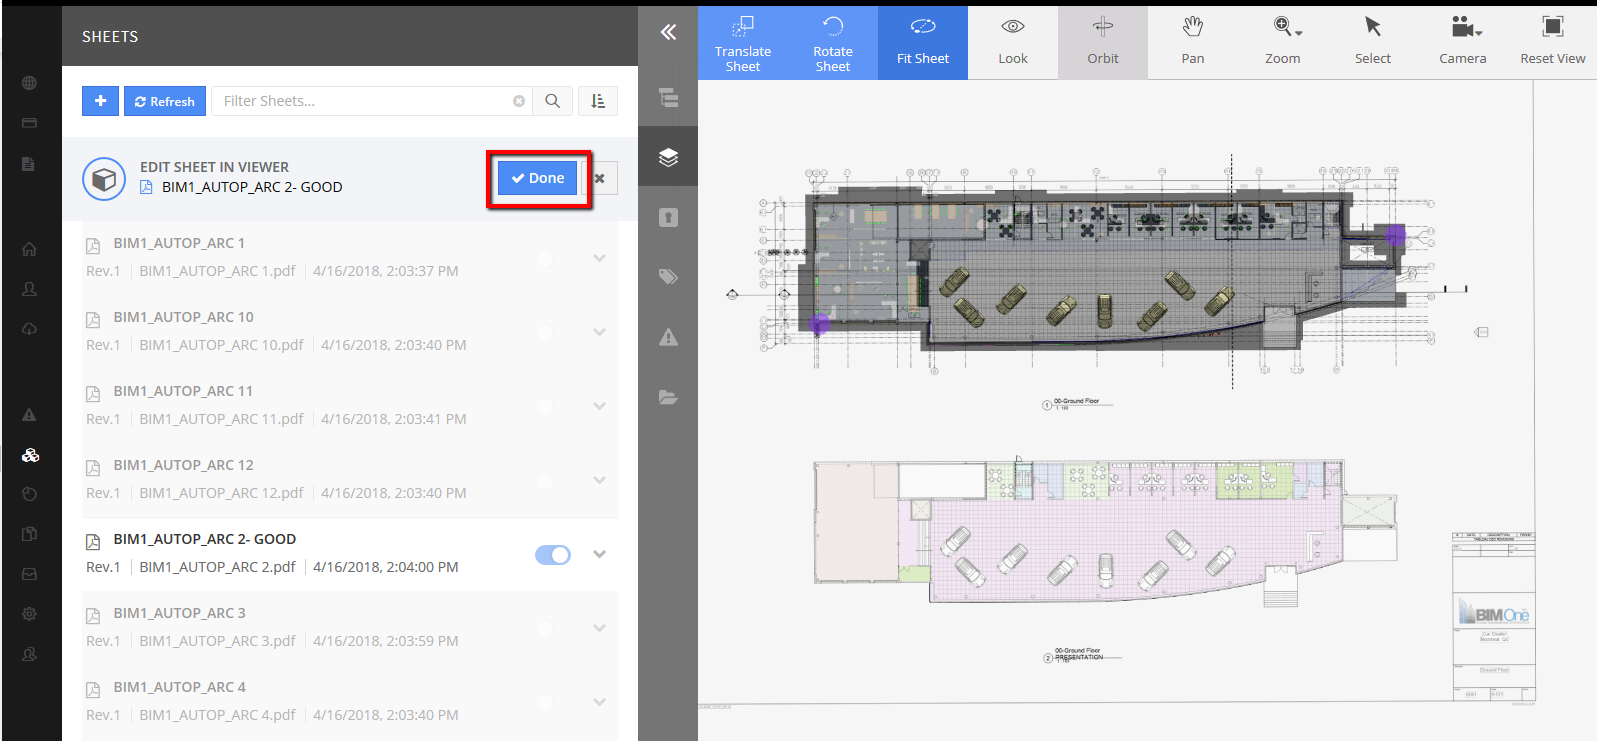
If the PDF you’ve turned on is an elevation view, we’ll need to rotate it because it will come in in the wrong plane. Follow these steps to rotate the sheet:
- Put the model into an orthographic viewstate from the Camera drop down.
- Use the view cube to rotate the model (Top).
- Beside the PDF file you have to click the down arrow.
- Click the Edit in viewer command.
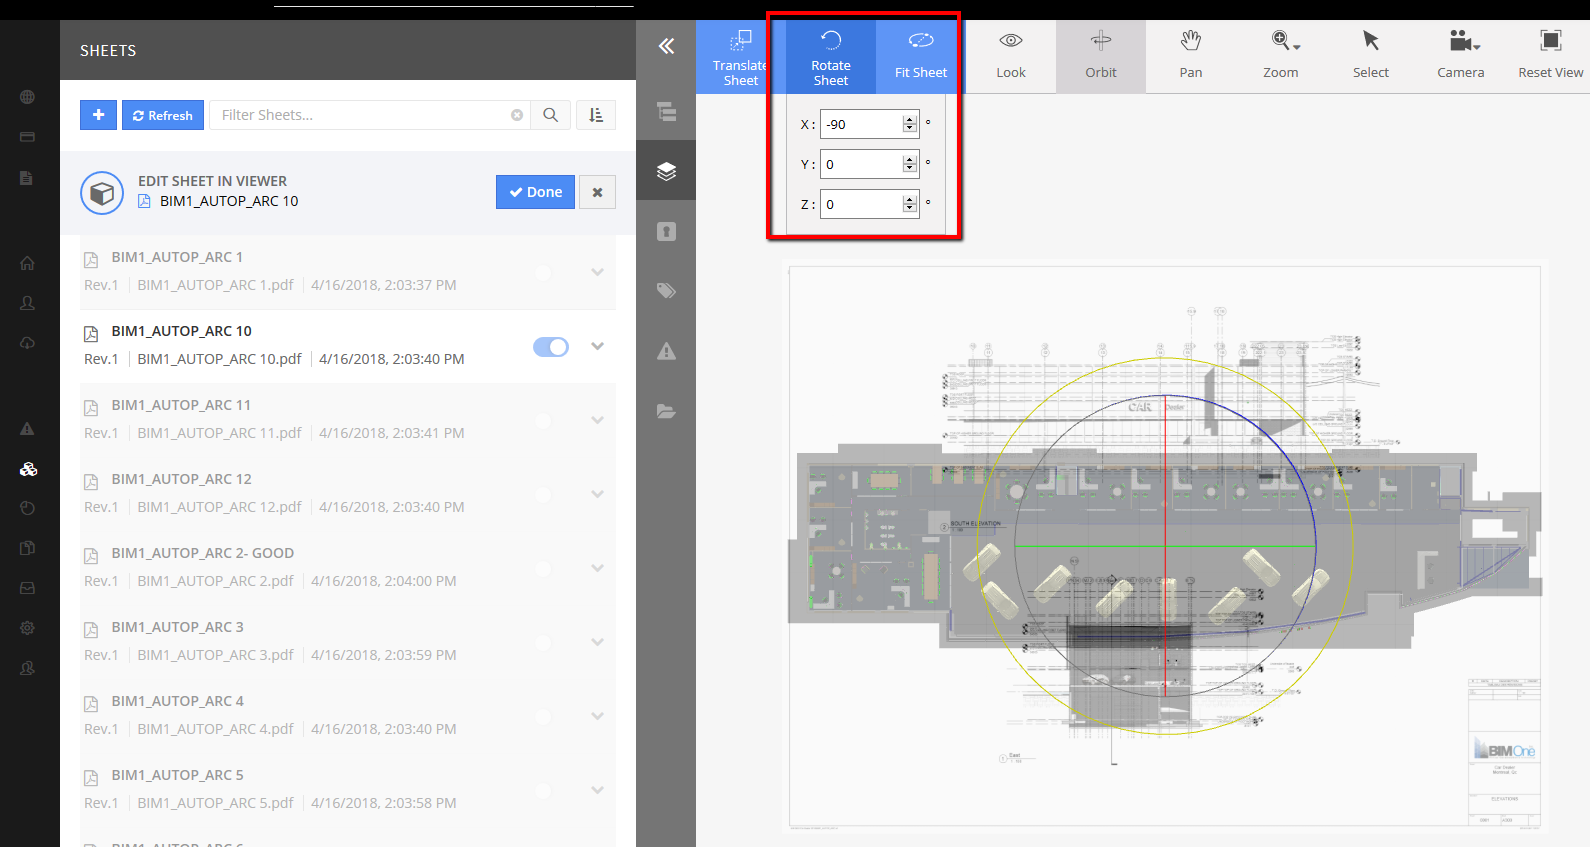
- Click the Rotate Sheet command.
- A rotation sphere will appear in the browser. Click and drag the axis needed.
- Notice the X/Y/Z degree changing in the ribbon. You can alternatively type in the degree here as well.
- Go to the FRONT view of the Model. Notice the sheet is not placed in the right location.
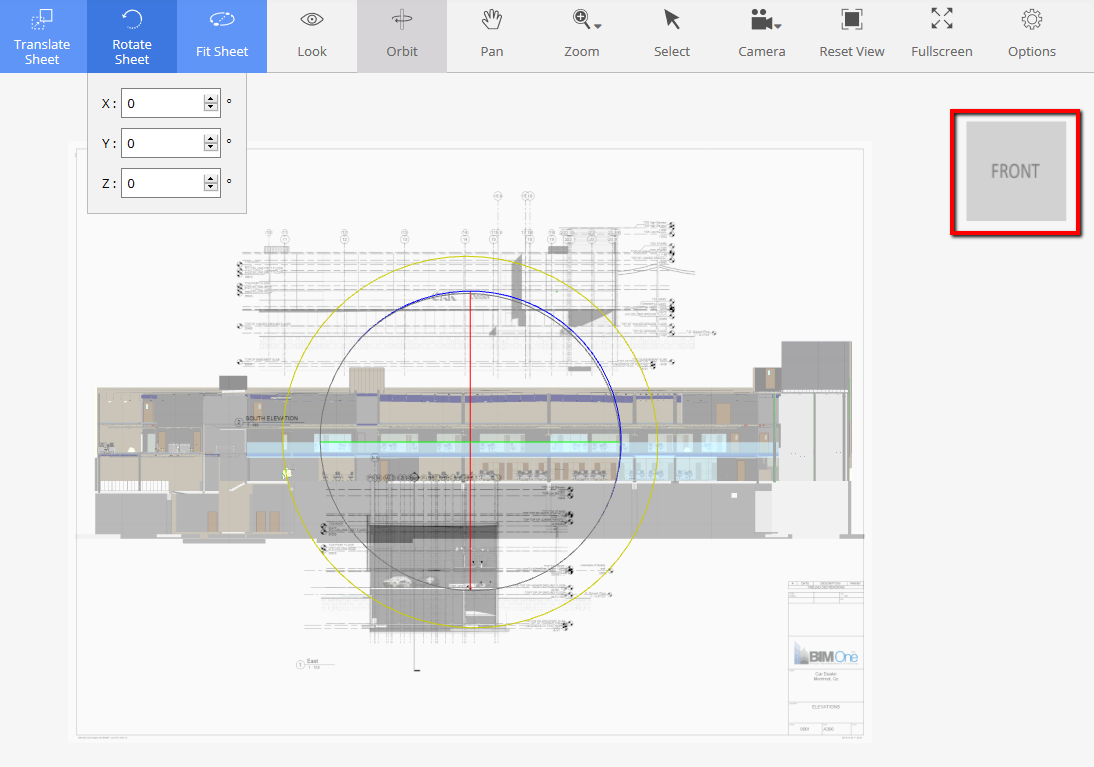
- Return to the TOP view and click the Translate Sheet command.
- Use the X/Y/Z coordinate system to move the sheet or click and hold the red/blue/green arrows that appear. Drag the sheet to the appropriate location.
- Go back to the FRONT view and use the steps above with the Fit Sheet command to resize and align the sheet with the model.
- Click Done once you have finished setting the scale and alignment.
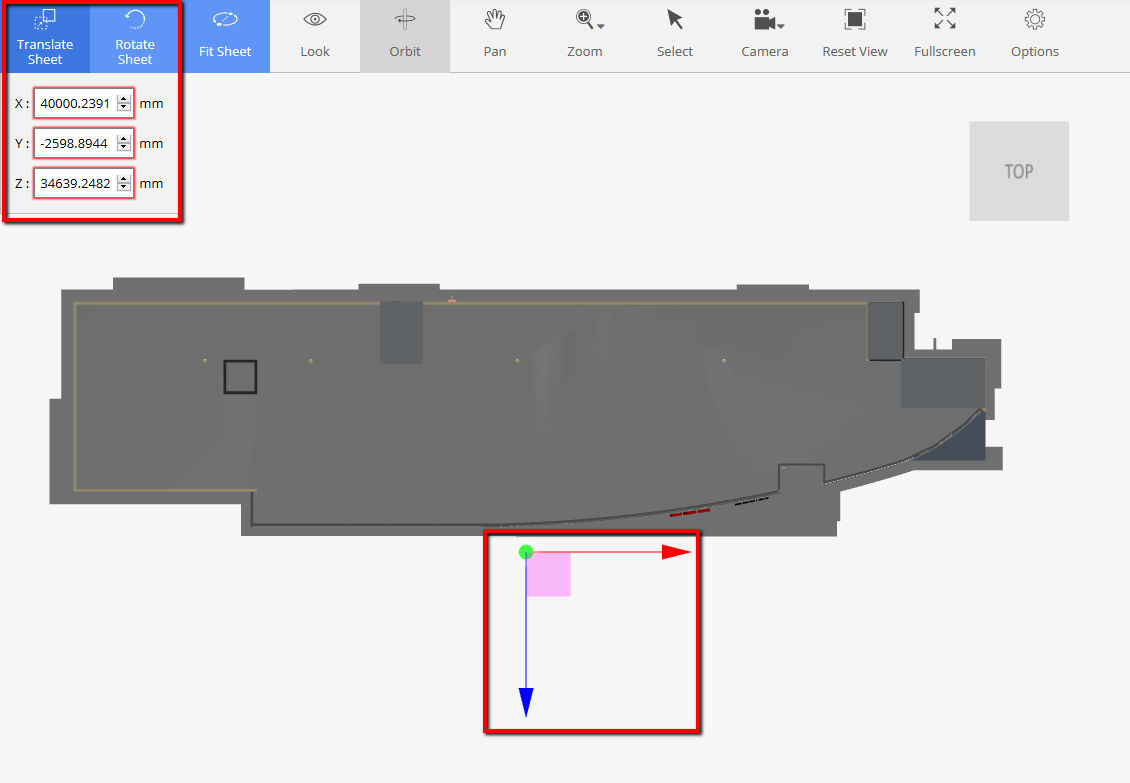
Before aligning/scaling the sheet to the model it is helpful to hide elements in the model that may become distracting. For example: if we are aligning the sheet to the exterior corner of the building it will be helpful to hide the footing that may be appearing below.
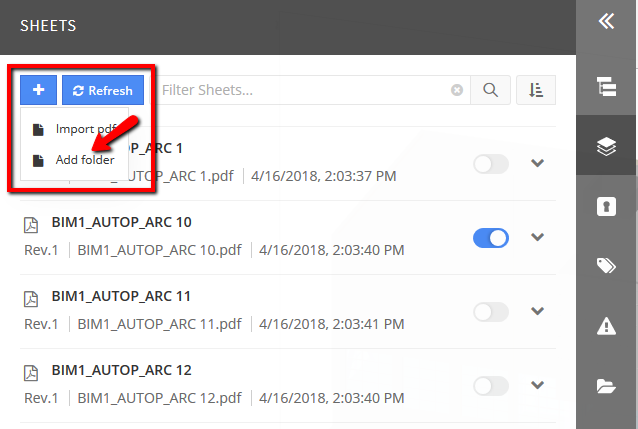
Remember, keeping the sheet list organized will allow you to quickly find the appropriate sheet. Use folders to divide the sheets by revision date or view type (plan/elevation/section/etc).
Sheets with Multiple Pages
When importing a sheet that contains multiple pages, Newforma Konekt can separate each page and import them as individual sheets. Simply select the PDF file that contains multiple pages and import as we did above.
Newforma Konekt will immediately recognize how many “new vs. revised” sheets are being imported.
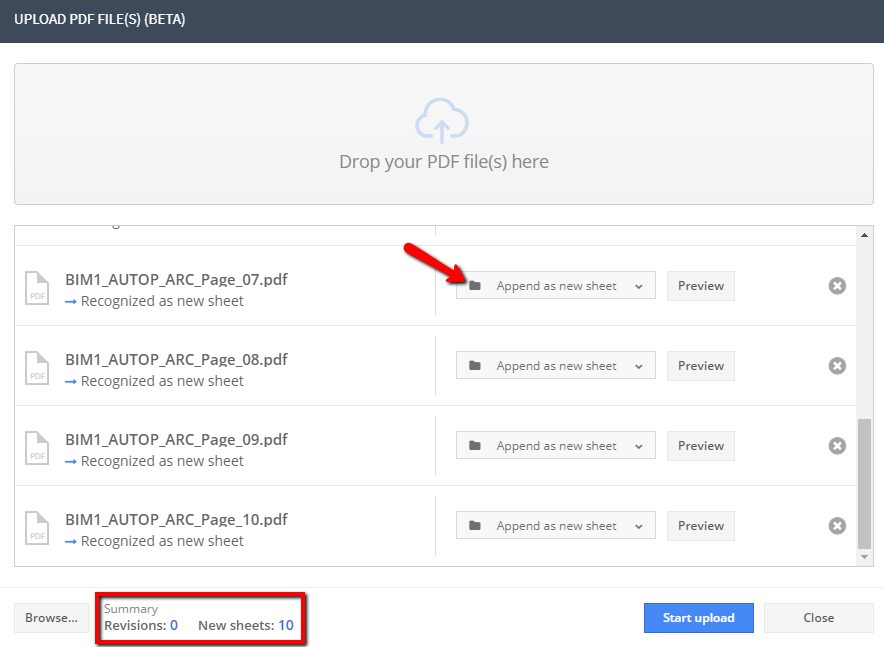
In our example above, this is the first sheet of combined PDF files. We’re going to import 10 of the 12 sheets of the file. We can remove sheets in the package of PDF’s that you don’t need by clicking the X at the end of the sheet row and it will be removed from the upload. You can click the “Preview” button to see each individual sheet. Once ready to bring into the project, simply click the Start Upload button and your sheets will be individually imported.
We can now create new folders and separate the sheets as desired.
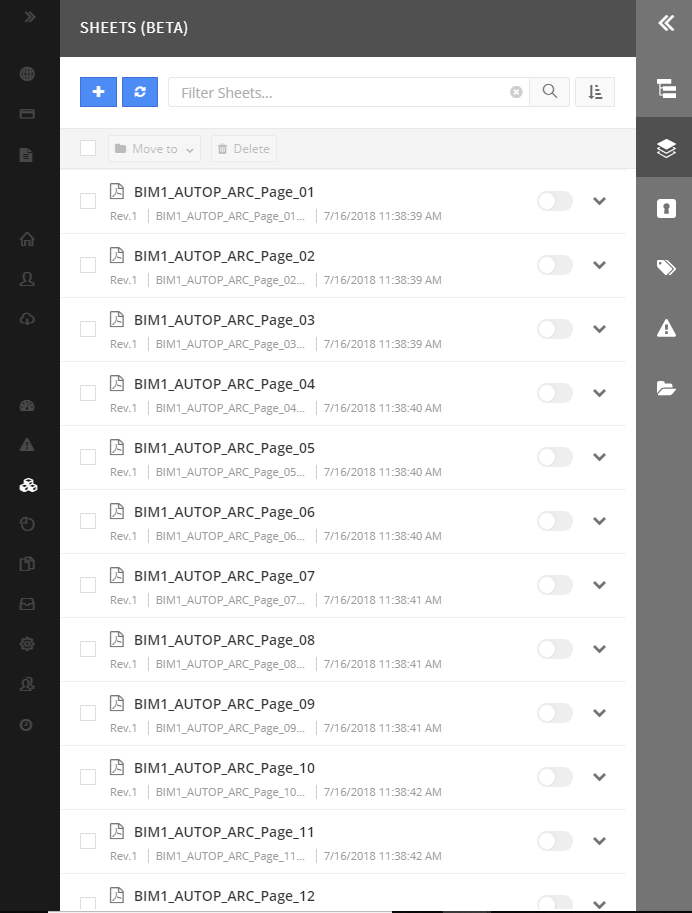
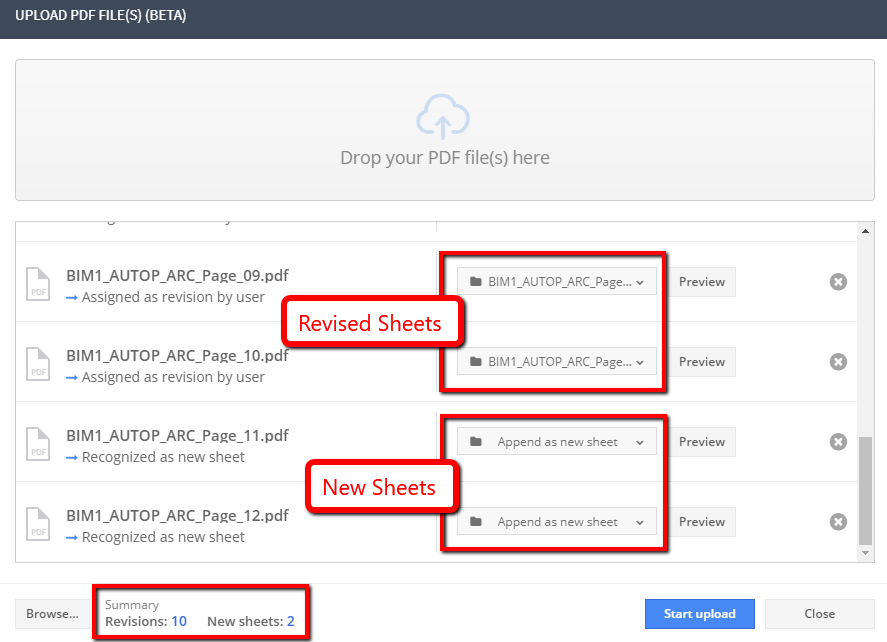
Upon receiving a new combined set of PDF files we can repeat the above steps to upload the sheets, but this time the sheets are appended to the existing PDF files we’ve already uploaded. In the example seen here I had previously uploaded 10 sheets, and I see the two new sheets that are being added.
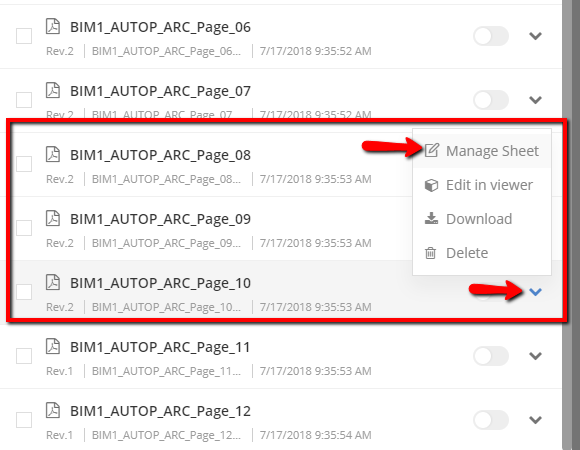
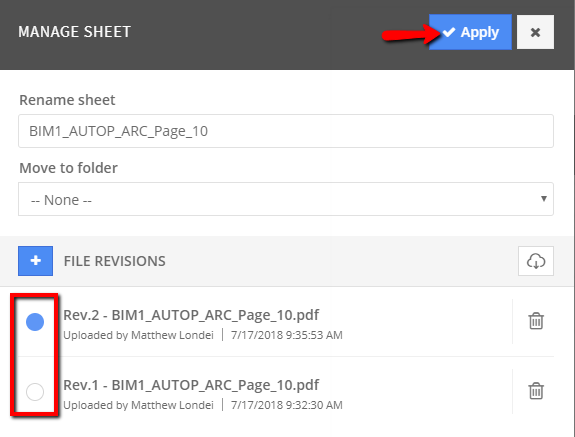
We now have the ability to select between any of the revisions of a sheet by dropping down the arrow at the end of the sheet row and selecting Manage Sheet. You can then select the sheet you want to be displayed in the web Viewer and then click the Apply button.
