Clashes to Issues (Add-ins)
The Clashes to Issues feature publishes clashes detected by Navisworks directly to Newforma Konekt. The suggested workflow gives the ability to quickly share clashes with all the users involved in the project possibly using different platforms. This eliminates the need to exchange complicated Excel sheets and clash reports sent by email. Clash information can be quickly recovered in any connecting software such as Revit and Tekla, giving the user the ability to quickly review a clash in its context with just a few clicks.
Related: Check out our article describing Best practices When Publishing Navisworks Clashes to Newforma Konekt.
- In Navisworks, open the desired model.
- In the ribbon, click Newforma Konekt tab > Open Newforma Konekt.
- In the Newforma Konekt panel, click Sign In, then from the browser tab that opens, enter your credentials and click Sign In.
- Back in Navisworks, select a hub and a project.
- Run clash tests. In the Navisworks clash detective window, It’s possible to select a clash or a group and adjust the viewpoint. Once a viewpoint has been updated, a camera icon will appear next to it. Those viewpoints will be used when exporting clashes to Newforma Konekt. Note: Newforma Konekt records all the information pertaining to the current view, and so if a perspective view is used, the issue/clash is sent to Newforma Konekt with that information. Then, when reviewing that issue/clash, the view will be restored using the same view settings. For example: If an issue is published from Navisworks using a perspective camera and reviewed in Revit later on, the issue will be recovered in a perspective view. It is suggested to publish clashes using an orthographic camera because there are limitations in various softwares surrounding the perspective camera mode. This will make it easier for other parties to locate and view the issues.
- To better organize your results, group your clashes. Newforma Konekt keeps the same structure by creating a single issue for each group. Clashes contained in a group are appended to the issue as separate viewpoints. For example: In Navisworks when a group that contains 6 clashes is published to Newforma Konekt it will result in 1 single issue that contains 7 viewpoints (1 viewpoint for the group and 6 for each individual clash).

- Define settings for clash group publication. The default option in the Clashes tab is set to Publish only the group’s viewpoint and the first clash pinpoint.
- From the drop-down list on the right, click Clashes to Issues or click Clashes to Issues from the ribbon.
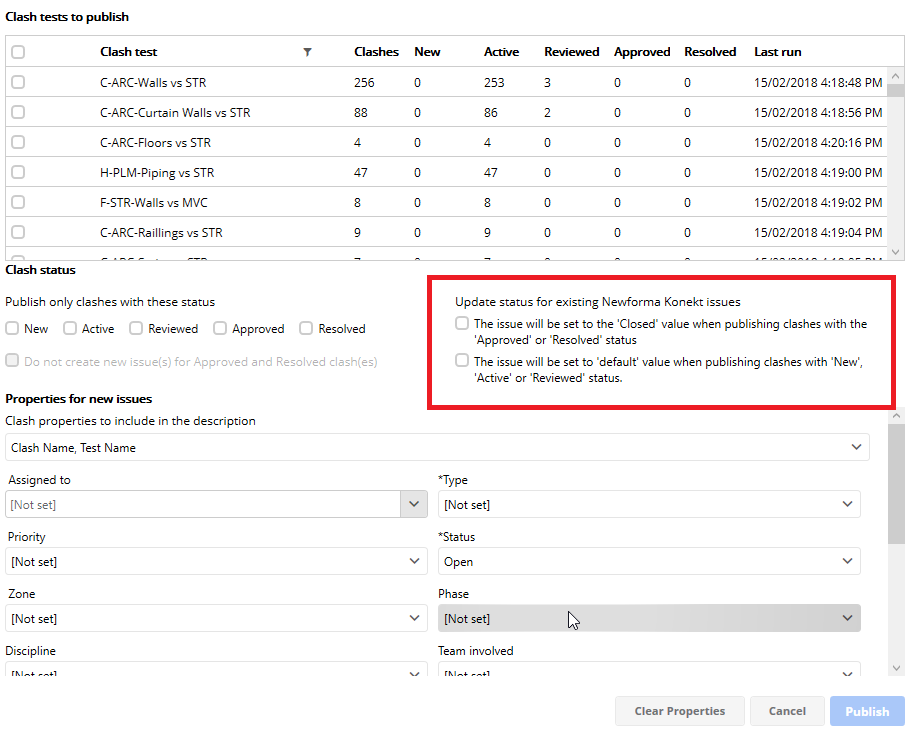
- In the Newforma Konekt – Clashes to issues dialog, decide what gets published.

- Clash tests to publish – select which tests are going to be exported. Any number of tests can be published, simply make sure to select the proper test(s) prior to publishing.
- Clash status – it is possible to filter clashes using the status. Using this list to help specify which clashes are going to be exported based on the status. The way to send information to Newforma Konekt is from the Status in Navisworks.
- Approved is used for False positive or clashes that aren’t real clash (won’t create any issue in Newforma Konekt)
- Reviewed is used to create issues in Newforma Konekt
- You can also enable the Do not create new issue(s) for Approved or Resolved clash(es) option.
- Update issue status for existing Newforma Konekt issues – Once you have clashes groups approved or resolved in the Clash Detective, you can update the status of the associated Newforma Konekt issue by reusing the Clashes to Issues command with the following options. The preview image and comments can also be updated.
- The issue will be set to the ‘Closed’ value when publishing clashes with the ‘Approved’ or ‘Resolved’ status. – This will automatically close the issue.
- The issue will be set to ‘default’ value when publishing clashes with the ‘New’, ‘Active’ or ‘Reviewed’ status. – This will reopen previously closed clashes through the Navisworks Clash Detective.
- Properties for new issues – Various properties related to the clash can be added directly in the description of the issue published to Newforma Konekt. This only works when clashes are published for the first time. No information is added to the description of the issue if the same clash test is published for a second time.
To publish issues with different properties/attributes from the clash detective, you will need to publish those issues in multiple batches. - Issue attributes – A standard set of attributes can be configured prior to publishing a clash test. Remember all the attributes set at this stage in the process will only be transferred for new issues being created and will not apply to existing issues being updated. The group attribute can be automatically filled by checking the option. This option adds the name of the corresponding clash test to the group where it originated directly to Newforma Konekt. Hint: This option gives a quick way to filter the issues related to that clash test later by filtering Newforma Konekt issues list.
- When you are satisfied with your issue, click Publish.
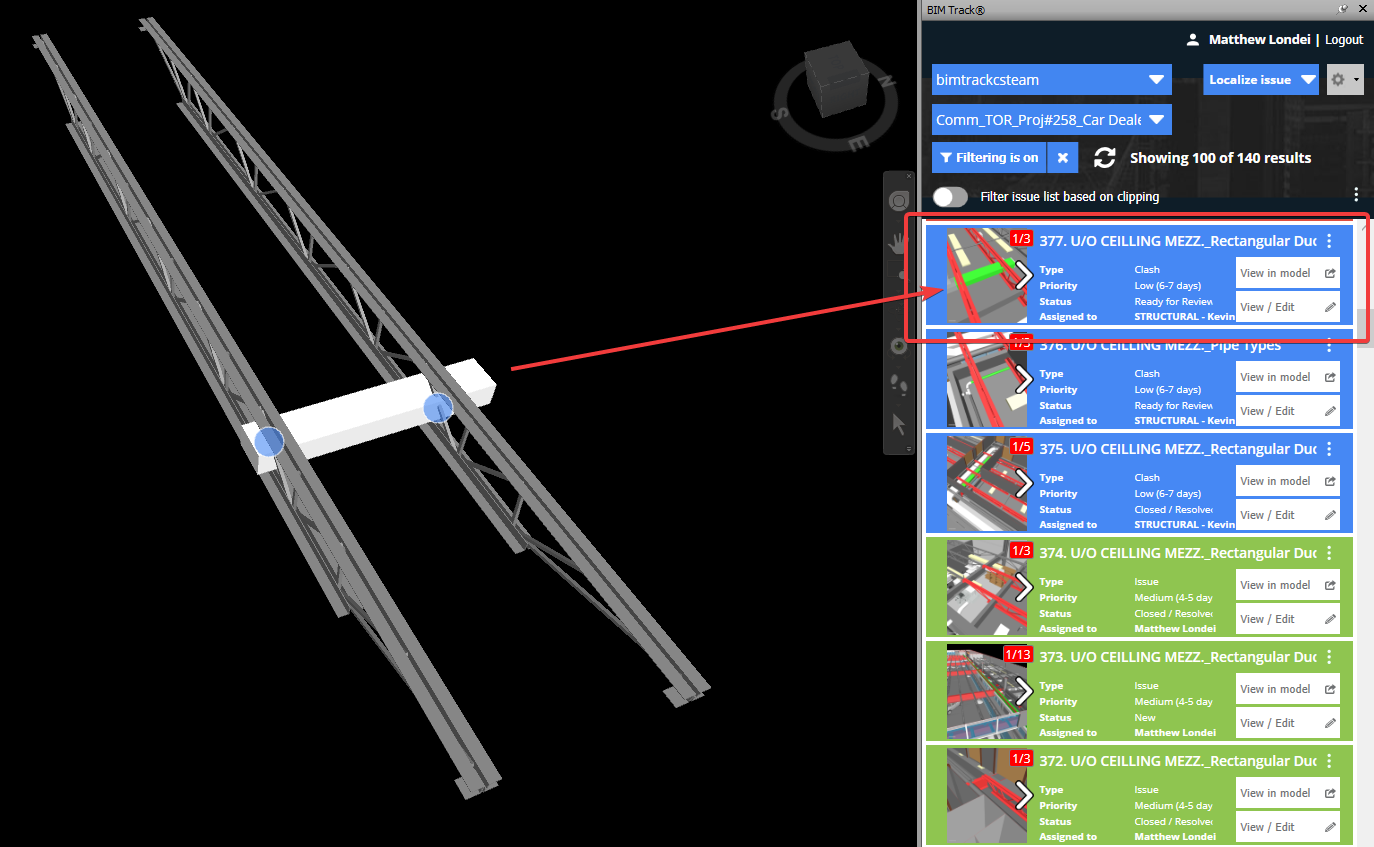
When a clash is published to Newforma Konekt, the add-in records the two elements linked to the clash. When reviewing that clash using Newforma Konekt add-in or the online 3D Viewer, it is possible to isolate the two elements linked to that clash which gives the ability to get a quick visual of the issues elements.

If you have specified that you want to publish oversized groups, you’ll receive a message indicating how many oversized groups were published to Newforma Konekt. You can also identify which groups were published with only the group’s viewpoint and the first clash pinpoint if there is a camera icon displayed next to the group in the Clash to Issue dialog.
If you have specified that you do not want to publish oversized groups, you’ll receive a message indicating how many oversized groups were ignored. Oversized groups can be identified by a yellow warning icon in the Clash to Issue dialog.
What’s next
Now you can synchronize your clashes back and forth, from Newforma Konekt to Navisworks and from Navisworks to Newforma Konekt. As a recommended workflow we suggest you try and go one way (from Navisworks to Newforma Konekt). This will reduce the risk of mistakes. We tend to use Reviewed to create new issues, because we don’t have control over the status New and Active.
