Newforma Konekt File server connector: quick start for project admins
Overview
The file server connector centralises your file management systems in Newforma Konekt and helps create a single source of truth for project information. Your team can access this information on-the-go without a VPN connection, and can attach files from you server directly to an RFI, Submittal or Change Order.
Configuration
Prerequisites
Your IT department needs to configure your file server before it can be connected to Newforma Konekt. This requires an IT admin to configure your Windows servers as well as your Azure tenant to allow data sharing with a cloud-based solution. Make sure you get your Tenant ID and Proxy URL from your IT admin.
Information value format
| Information | Value format |
| Tenant ID | 11111111-1111-1111-1111-111111111111 |
| Proxy URL | https://[server_name]-konektodrive.msappproxy.net/ |
Adding a local file server to Newforma Konekt as a project administrator
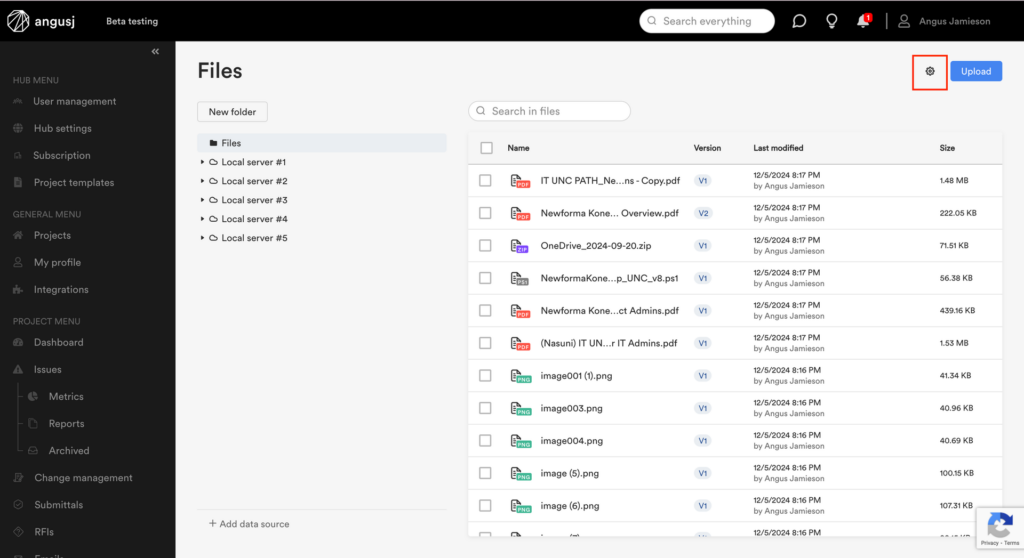
In Newforma Konekt, open the desired project and select Files under Project menu. Click File Settings in the top right of the File Manager.
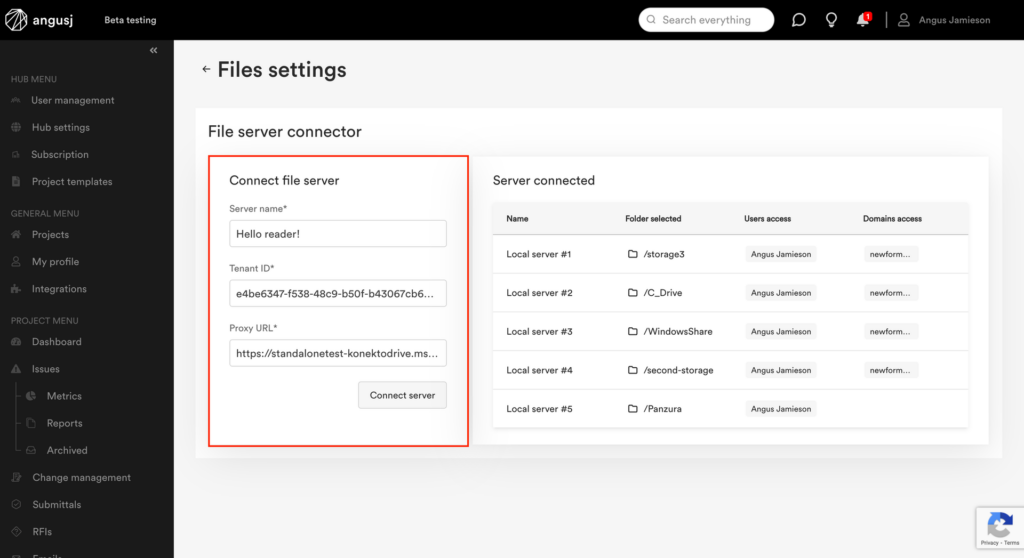
Complete the local server information and click Connect server. NOTE: you will be notified if any of the information is incorrect.
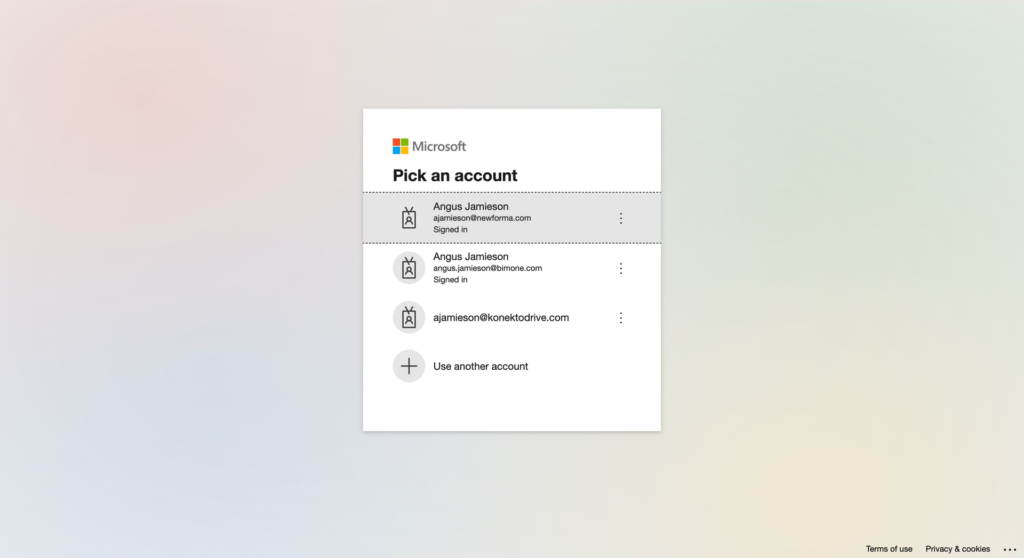
Authenticate your access to the server using Entra ID to finalise the connection. You will see a “Connection successful” message before being redirected to the File settings page.
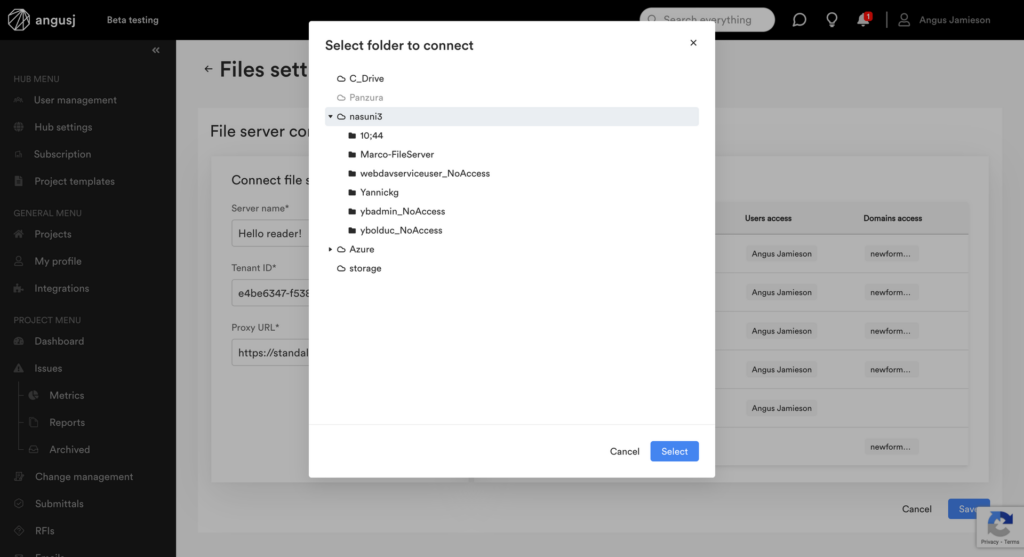
Select a folder to connect. You can connect the entire server if desired, or you can choose a particular layer. NOTE: your team will only be able to access folders and subfolders below the connected layer.
Add users to the file server in Newforma Konekt. You can add users by clicking on the empty field in either the User access column or the Domain access column. A dropdown menu will be displayed. Your domain will be automatically added to the Domain access column giving users from your organisation default access to the server.
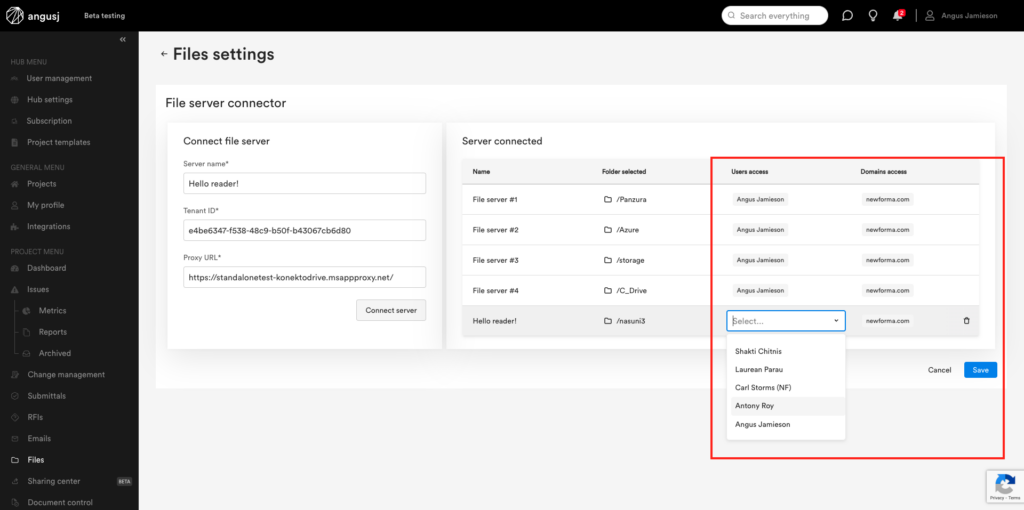
NOTE: Newforma Konekt does not create access permissions to your file server, it mirrors user permissions on the local level. Users will need to authenticate their access to your server using Entra ID before accessing the server.
Click Save.
Usage
Accessing the file server as an end user
The file server will display in the tree view of a user’s File Manager after they have been added to the server. Users will need to authenticate their access using Entra ID before accessing the file server. They can click the text Login or the login icon at the end of the server row in the tree view.
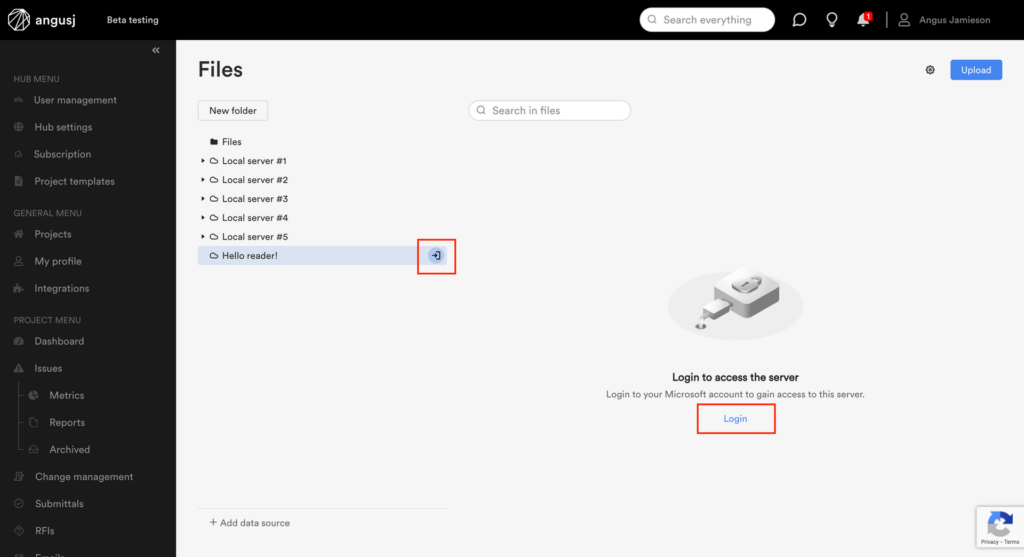
Editing the file server connection: removing a file server
To remove a server, simply clickthe trash canicon on the far right when hovering over a row in the File Settings. You will be informed how many users will lose access to the server and be required to confirm the removal.
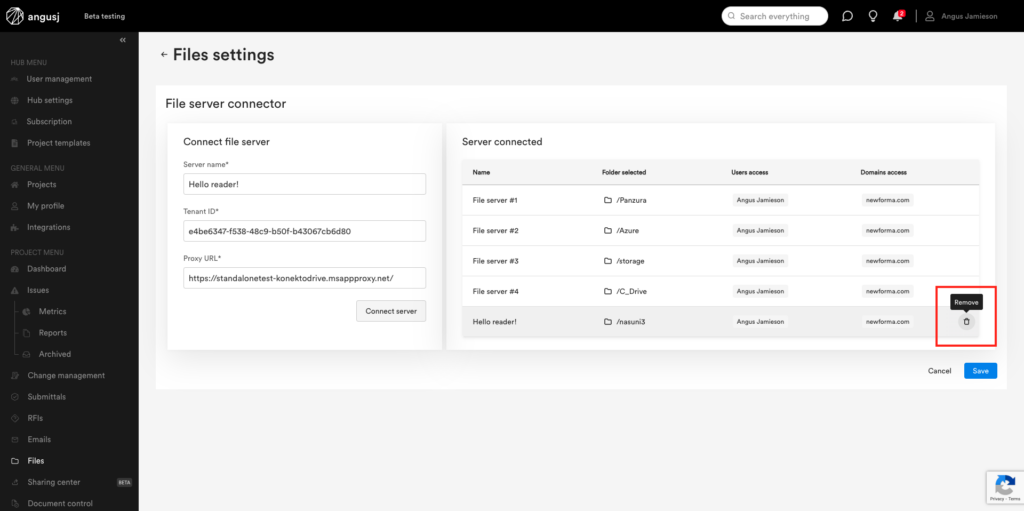
Changing the selected folder
You can change the connected folder by clicking its name. The Select folder to connect dialog box will load and you will be required to reauthenticate your access to the server. From there you can select another folder to connect.
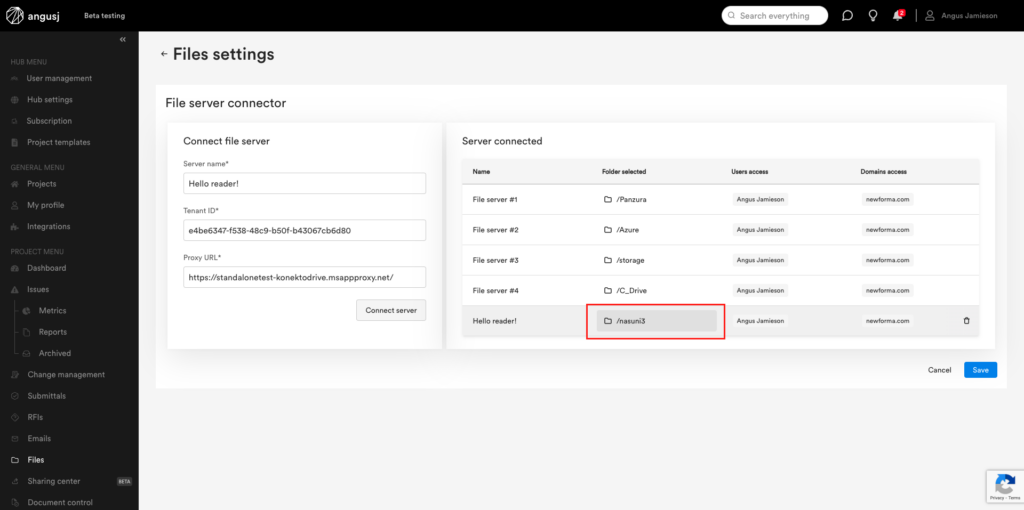
Feature matrix
The table below provides a list of features available:
| Features | Project admins | Project team members with access to the connector |
| Add a local file server to one or more projects | ✔️ | |
| Configure user access | ✔️ | |
| Change the connected folder | ✔️ | |
| Remove local file servers | ✔️ | |
| Download local files | ✔️ | ✔️ |
| Open file and folder details | ✔️ | ✔️ |
| Rename and delete files and folders | ✔️ | ✔️ |
| Share files and folders via email | ✔️ | ✔️ |
| Move files or folders | ✖️ | ✖️ |
| Download folders | ✖️ | ✖️ |
| View history for files shares | ✔️ | ✔️ |
| View history for folder shares | ✔️ | ✔️ |
| View history for other actions to files and folders | ✖️ | ✖️ |
